Garlic Bread Twists are delicious, fluffy and the perfect thing to enjoy with pizza, pasta, or just because. With just a few simple ingredients and a bit of your time, you can create these homemade bread twists in no time.
Whether you want to make an appetizer for your dinner party or a quick snack for your kids, garlic bread twists will do the job. They're also great for game nights or watching movies with friends. Make sure to have plenty of sauce and cheese handy - garlic bread twists are even better when dipped!
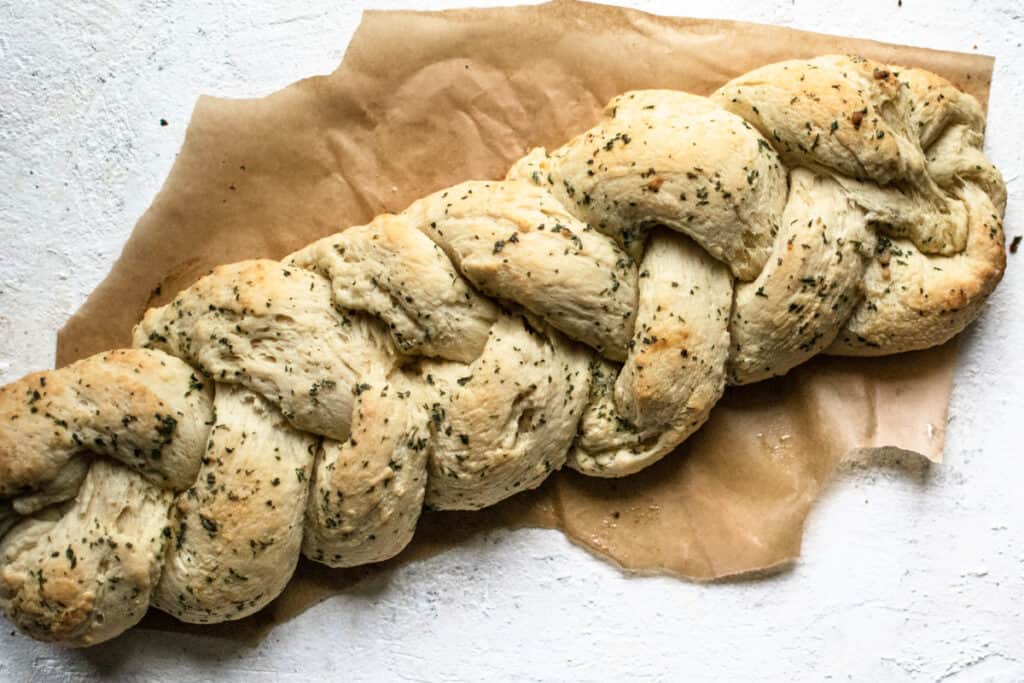
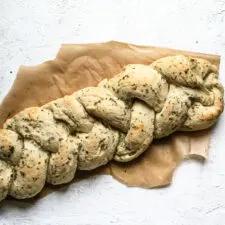
If you like garlic knots, then this giant garlic knot bread recipe is a must-make. It's like a king size version of a garlic knot.
It gets slathered with garlic and herb butter before baking in the oven, so it gives the outer crusts a beautiful glow. Any extra drips fall into the creases where it bakes in, so not a drop gets lost.

Why Make These Bread Twists?
- This breadstick recipe is super easy to make, is always a huge hit, and is made from pantry staple ingredients, nothing crazy.
- These garlic twists are a great side with any pasta night or pizza night and go great with your favorite soup, stews, and salads.
- The herb mixture is easily customizable to suit your taste buds.
- These garlicky breadsticks are even delicious dipped in marinara sauce or other dipping sauce.
Ingredients Needed
Get more info, like quantities on the ingredients, check the recipe card at the bottom of post for more info.
For the bread dough:
- large eggs
- lukewarm water
- sugar
- salt
- garlic powder
- active dry yeast
- bread flour
For the garlic herb butter:
- butter- use unsalted butter since you're adding salt later
- garlic powder- you can swap this out for fresh minced garlic
- salt
- spices- we used dried parsley basil, and oregano.

How to Make Garlic Bread Twists
- Add all ingredients to the bread machine and set to dough cycle. You can make the dough by hand if desired. The dough needs to be forming a ball, not a batter. Add a touch more bread flour if necessary, or water if too dry.
- If kneading by hand, combine all ingredients, turn over onto a floured surface, and knead for 10 to 15 minutes.
- Grease a large mixing bowl, place the dough ball in it, and cover it with plastic wrap or a clean kitchen towel to let the dough rise in a warm place for 1 hour.
- Preheat oven to 375 degrees.
- Once the bread cycle is complete (or the first rise is complete in the bowl), invert the dough onto a well floured area. Divide into 3 equal portions. Roll the portions into 12-inch long tubes.
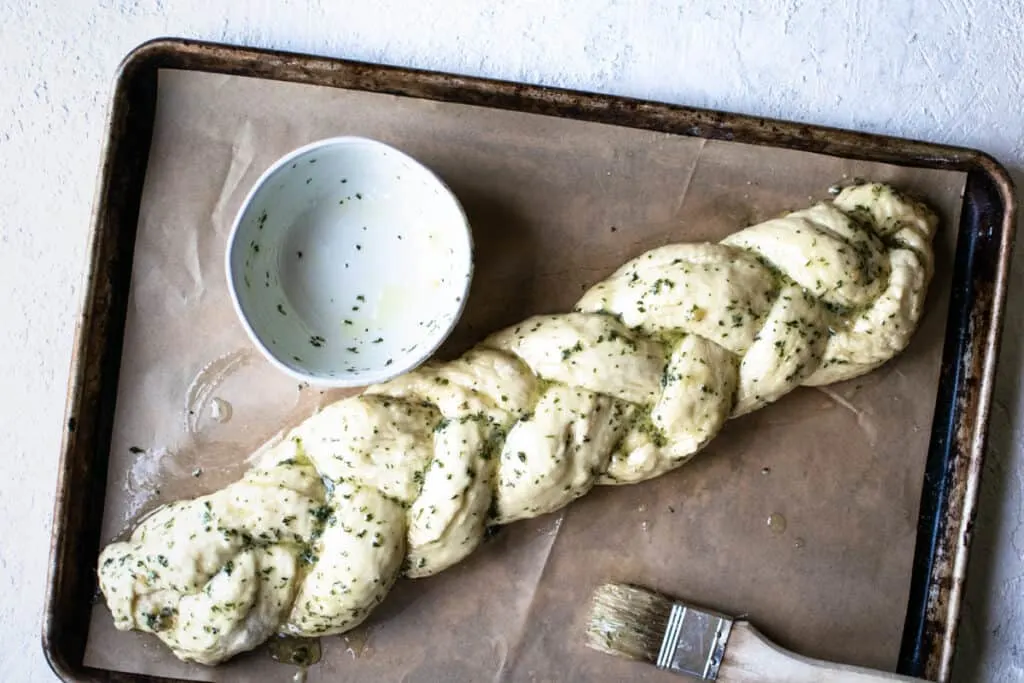
- Press the top of the three strands together, and fold under to cover the crease, fanning the long sections out in a wide, triangular shape. Proceed to "braid" the bread. Once to the end, press them together and fold under, similar to the top.
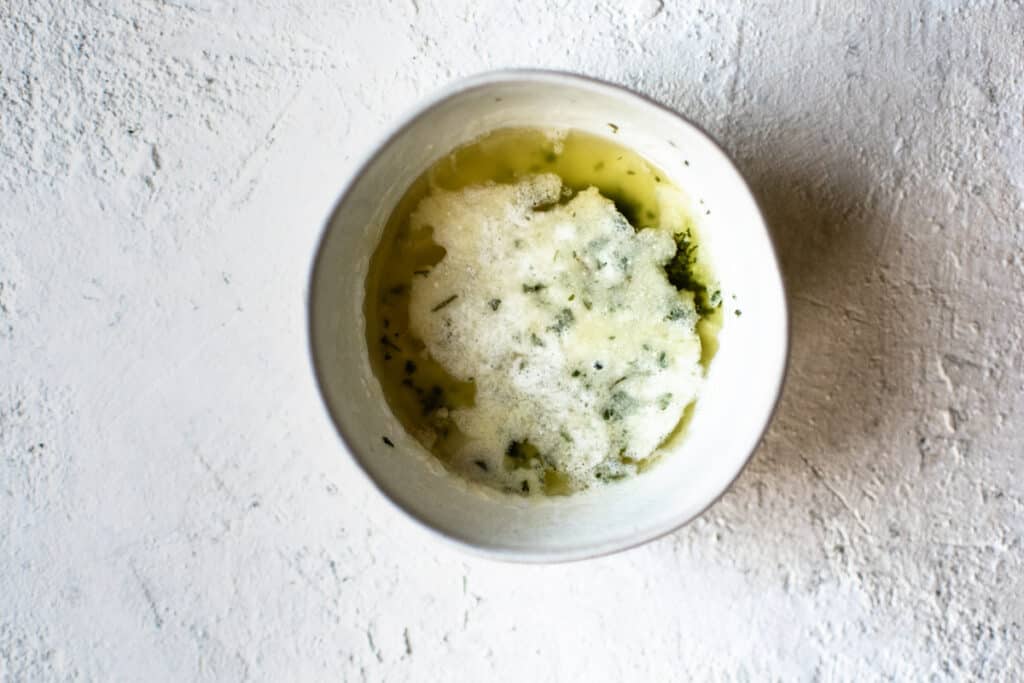
- Mix butter, salt, garlic powder and dried herbs together in microwave safe bowl and microwave on high 30-60 seconds, until melted. Brush half of the butter over the entire braid.
- Cover loosely with plastic wrap (don't trap the dough braid from rising) and allow to rise in a warm area again for 30-60 minutes for a second rise. I like to do this on top of the oven while it preheats to speed the process along!
- Remove the plastic wrap, stir the butter sauce with the brush (reheat if it's solidified), and CAREFULLY brush the remaining garlic and herb butter over the risen bread loaf again, being careful not to apply too much pressure that you deflate the loaf.
- Bake 20-25 minutes, until golden brown.
Storage
Once the garlic bread twists have cooled, you can store them in an airtight container or bag.
For the best results, make sure that no air is able to get in. If stored properly, your homemade garlic bread twists will last up to 2-3 days at room temperature.
If you want the garlic bread twists to last longer than a few days, then they can be stored in the fridge for up to a week.
Alternatively, they can be frozen for up to 3 months - just make sure that they are wrapped tightly and secured before freezing. When ready to eat the best breadsticks, simply thaw and reheat the garlic bread twists in the oven until warm and crispy.
Can you freeze unbaked bread twists?
Yes! Just make sure you go through the first rise, then form the bread, then freeze.
Take it out of the freezer, brush with the melted butter, and allow to thaw/rise for the second time on the counter at room temperature for about 4-6 hours until doubled in size.
Bake as normal and brush with the garlic butter again as directed.
Can you freeze baked bread?
Yes, you can freeze these garlic bread twists once you have baked them, but just know the exterior may be a little stiffer when you try to thaw and reheat them.

Tips and Variations
- Keep in mind that the time it takes for your dough to rise may vary depending on many conditions like room temperature, humidity, and more. Our estimated rise time is just an estimate.
- Instead of a large garlic twist, you can make a few smaller bread twists.
- Make some parmesan twists by adding fresh grated parmesan cheese with some olive oil on top of the homemade breadsticks right when you remove them from the oven.
- You can use Italian seasoning instead of the individual herbs if needed.
- Add some shredded mozzarella cheese to the inside of your bread braid to make some cheesy garlic bread twists!
What is lukewarm water?
Lukewarm water is a temperature between warm and cool. Water that is hot to the touch but not burning-hot is typically considered lukewarm. It should feel comfortably warm on your skin, not too cold or too hot.
Lukewarm water can be used in baking recipes like bread, as it helps activate the yeast and help with rising. To check if the temperature of the water is lukewarm, you can test the warm water against the inside of your wrist or palm.
If it feels warm but not burning-hot, then the water is likely lukewarm and suitable for baking recipes such as bread. Typically, lukewarm water is between 98-105F.
Do I have to use the bread machine?
If you don't want to use your bread machine or don't have one, you can still make the dough for these garlic twists. Just combine the ingredients in a bowl, and knead by hand on a lightly floured surface for up to 10 minutes.
Grease a large bowl, and set the dough in to rise for 60-90 minutes until doubled in size (covered).
Can I use a bread hook instead of kneading by hand?
Yes, using a bread hook can make the process faster, but I like kneading the dough by hand for the best texture and bread making experience.
What is the difference between white flour and bread flour?
Bread flour and white flour can both be used to make bread with. However, many recipes use bread flour and are tested with bread flour.
Bread flour has more protein than regular white wheat all purpose flour, and more stretch to the gluten strands, which results in a chewier bite. It's really good for breads like this!
But all-purpose is great too. If you want more in depth info on the difference between bread and white flour, check out this article from Bon Appetite. It's a great resource.
What's the difference between instant yeast and active yeast?
Instant yeast is a type of dry yeast that has been pre-mixed with other ingredients, such as enzymes and wheat flour, to help speed up the process of fresh bread rising.
It can be added directly to your dough without needing to be activated first. Active dry yeast needs to be hydrated in warm water before being added to your dough; this process will take 10-15 minutes and help activate the yeast.
Instant yeast will rise quicker than active dry yeast so if you're in a hurry then reach for the instant stuff!
📖 Recipe
Garlic Knot Bread
Ingredients
For the bread dough:
- 2 large eggs
- 1 cup lukewarm water
- 2 tablespoons sugar
- 1 teaspoon salt
- 1 teaspoon garlic powder
- 2 ½ teaspoon active dry yeast
- 3 ¼ cups bread flour
For the garlic herb butter:
- 4 tablespoons butter
- 1 ½ teaspoons garlic powder
- ¼ teaspoon salt
- 1 teaspoon each dried parsley basil, and oregano (to total one tablespoon) or similar mix.
Instructions
- Add all ingredients to bread machine and set to dough cycle (See below for by hand instructions). The dough needs to be forming a ball, not a batter. Add a touch more flour if necessary, or water if too dry.
- (If kneading by hand, combine all ingredients, turn over onto a flour surface, and knead for 10 to 15 minutes, before greasing a large bowl, placing dough ball in it and covering to let rise in a warm area for 1 hour.)
- Preheat oven to 375 degrees.
- Once the bread cycle is complete (or the first rise is complete in the bowl), invert dough onto a well floured area. Divide into 3 equal portions. Roll the portions into 12 inch long tubes.
- Press the top of the three strands together, and fold under to cover the crease, fanning the long sections out in a wide, triangular shape. Proceed to "braid" the bread. Once to the end, press them together and fold under similar to the top.
- Mix butter, salt, garlic powder and dried herbs together in microwave safe bowl and microwave on high 30-60 seconds, until melted. Brush half of the butter over entire braid.
- Cover loosely with plastic wrap (don't trap the dough braid from rising) and allow to rise in a warm area again for 30-60 minutes for second rise. I like to do this on top of the oven while it preheats to speed the process along!
- Remove the plastic wrap, stir the butter with the brush (reheat if it's solidified), and CAREFULLY brush the remaining garlic and herb butter over the risen bread loaf again, being careful not to apply to much pressure that you deflate the loaf.
- Bake for 20-25 minutes, until golden brown.
Notes
- Can be made by hand or in bread maker on dough cycle.
- Recipe is written for using instant yeast. But, if using active dry yeast, the yeast needs to be "proofed" by dissolving it for 5 minutes in the lukewarm water. Use the amount of water that the recipe calls for, heat to about 115 degrees F., stir in the yeast. Allow to sit for 5 minutes until the surface becomes foamy, which means the yeast is activated. You can estimate this temperature by running your finger under hot water: you should be able to stand it for about 3 seconds- any hotter and you'll kill the yeast.
Gail
Thursday 30th of October 2025
I've made this several times. Once I got my granddaughter to help, her mother was amazed because she never helps in the kitchen. We all love this bread.
Jordan
Wednesday 17th of July 2024
I’ve made this bread at least a dozen times and I never get tired of it. So good! The only thing I do differently is reduce the butter by half because 4tbsp seemed like way too much when I made it first time. I sure hate wasting good garlic butter! 😊
Amanda
Thursday 11th of January 2024
The ingredient list says active dry yeast not instant yeast! I already made the dough according to the instructions but didn’t see the bottom part until it was too late!!! Need to be more specific…
Natalie
Thursday 21st of December 2023
The bread turned out great! It was so fluffy and the herbs added great flavor.
No name
Tuesday 19th of October 2021
I advise to ready the whole recipe before making this bread. Total prep time is inaccurate. As written this recipe states that the total prep time is 1 hour 30 minutes. That time doesn’t account for anything other than letting the dough proof. A more accurate detail would be as follows prep time: 20 minutes Total proof time 1 hour 30 minutes to 2 hours Bake time: 20-25 minutes
So time needed is actually between 2 hours 10 minutes and 2 hours 45 minutes. I will say even those numbers are conservative as it takes a bit more time between the first proof, cutting the dough into thirds, braiding the dough, and putting the melted butter mixture on top. You’re really looking at closer to 3 hours from start to finish.
Erin
Friday 22nd of October 2021
Hi There, The time frame is an estimate and bread dough has a widely varying rise time. If it's summer time, hot and humid dough can rise twice as fast as in the cold winter. It can also cause a great change in time depending on if you put it by a drafty window or not. But I've heard of people turning on their oven to 200 degrees Fahrenheit, turning it off, then cracking the door with the dough rising in there. Supposedly this can dramatically decrease rise time! It also can make the time vary depending on your bread machine's dough cycle (or if you do it by hand). The total time listed at approximately 2 hours is just an average. If you like the recipe, you might try again and see if if the process goes more quickly?