Homemade Gluten Free Graham Crackers are a delicious and healthy snack for those who have to follow a gluten-free diet. They’re surprisingly easy to make, with common ingredients, and are the perfect snack to enjoy for kids and adults.
Not only are they incredibly tasty when made fresh from the oven, but you can also customize them according to your own taste preferences. If you’re looking for an easy way to get your gluten-free fix with something that still tastes delicious, homemade Gluten Free Graham Crackers may be just the right thing for you!
It doesn't matter if you have celiac disease, have a gluten intolerance, or are just avoiding gluten for other health or medical reasons, these homemade honey grahams are going to be safe and enjoyable for you!

Are Graham Crackers Gluten Free
No, most traditional graham crackers are not gluten free. Typically, they're made of graham flour, whole wheat flour, or all purpose flour. But, this gluten free crack recipe is safe and gluten free!
Why Make Your Own GF Graham Crackers
- Graham Crackers are fun to make with the kids in the kitchen.
- You can make your own gluten free graham crackers and use them for just about anything.
- You only need pantry ingredients to make some of the best graham crackers ever
- Homemade graham crackers or wayyyyy cheaper than storebought traditional graham crackers that are gluten free
- They'd be great for a gluten-free graham cracker crust or to make gluten-free s'mores with!
Ingredients Needed
Here's everything you need to make this easy recipe, get all the info on the specific quantities of these simple ingredients in the recipe card at the bottom of this post.
- all purpose gluten free flour- use your favorite gluten-free flour blend
- brown sugar
- salt
- baking powder
- large egg
- butter
- molasses
- honey
- vanilla extract
How to Make Gluten Free Graham Crackers
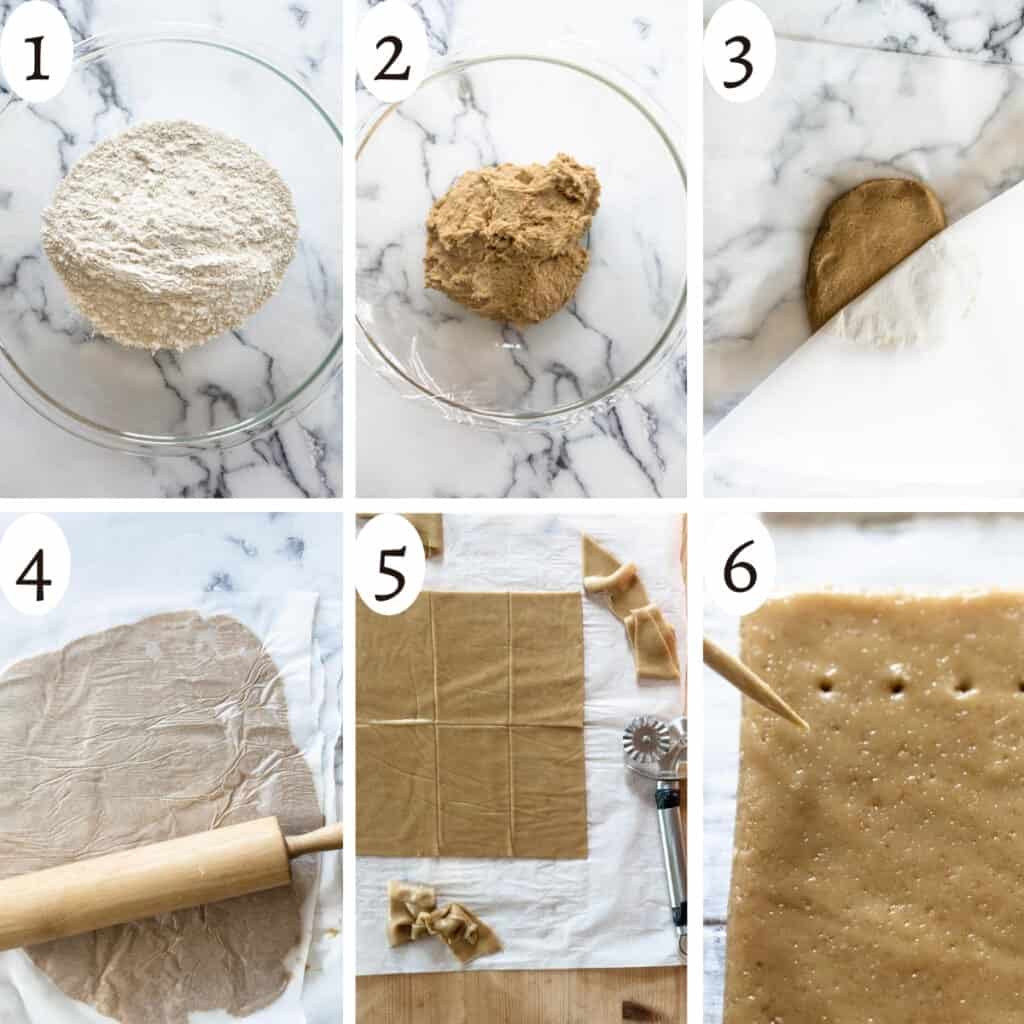
- In a large mixing bowl, combine the dry ingredients flour, sugar, salt, and baking powder together.
- Add the wet ingredients: egg, butter, molasses, honey, and vanilla until dough is formed.
- Wrap dough in plastic wrap and chill for at least one hour in the refrigerator.
- Preheat oven to 325F.
- While oven preheats, divide the dough into 2 or more portions. Roll each dough portion out between two pieces of parchment paper until it reaches a uniform ⅛th inch thickness. I recommend doing this directly on parchment paper.
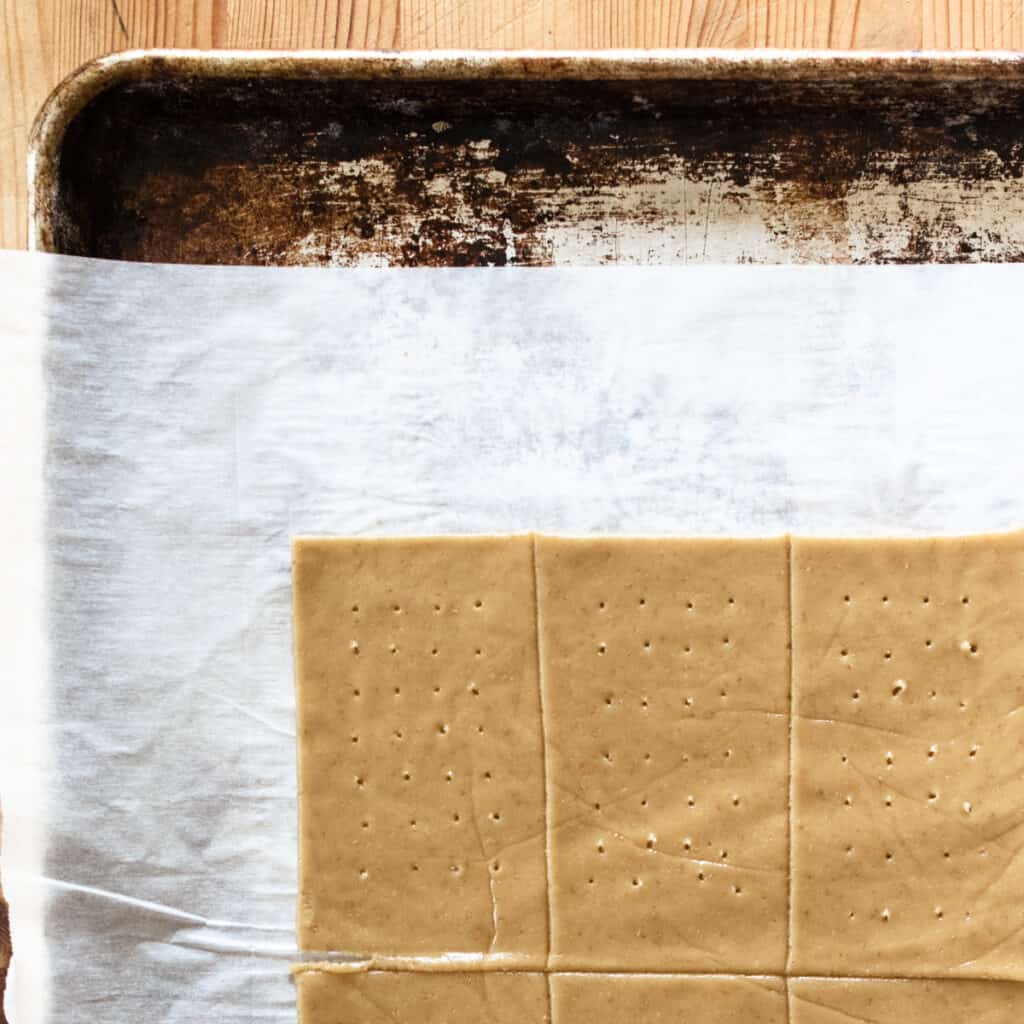
- Use a pizza cutter or non-serrated sharp knife to score rectangles in the dough and then trim off any excess dough while it's still on the parchment paper. Save excess dough to incorporate into subsequent rolling. Don't separate all of the rectangles just yet.
- Transfer connected rectangles directly to the baking sheet by lifting the parchment paper they are on, leaving them in place.
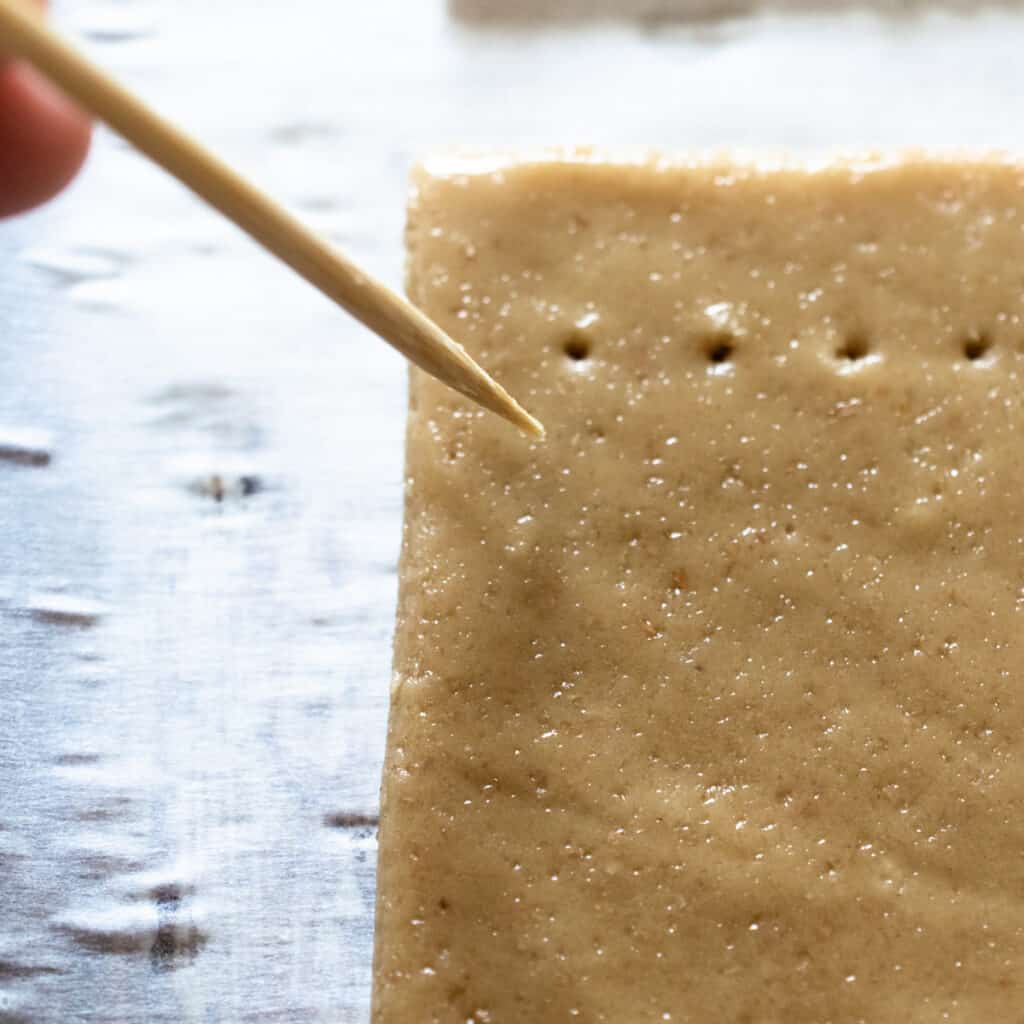
- Use a fork or toothpick to poke holes in the rectangles.
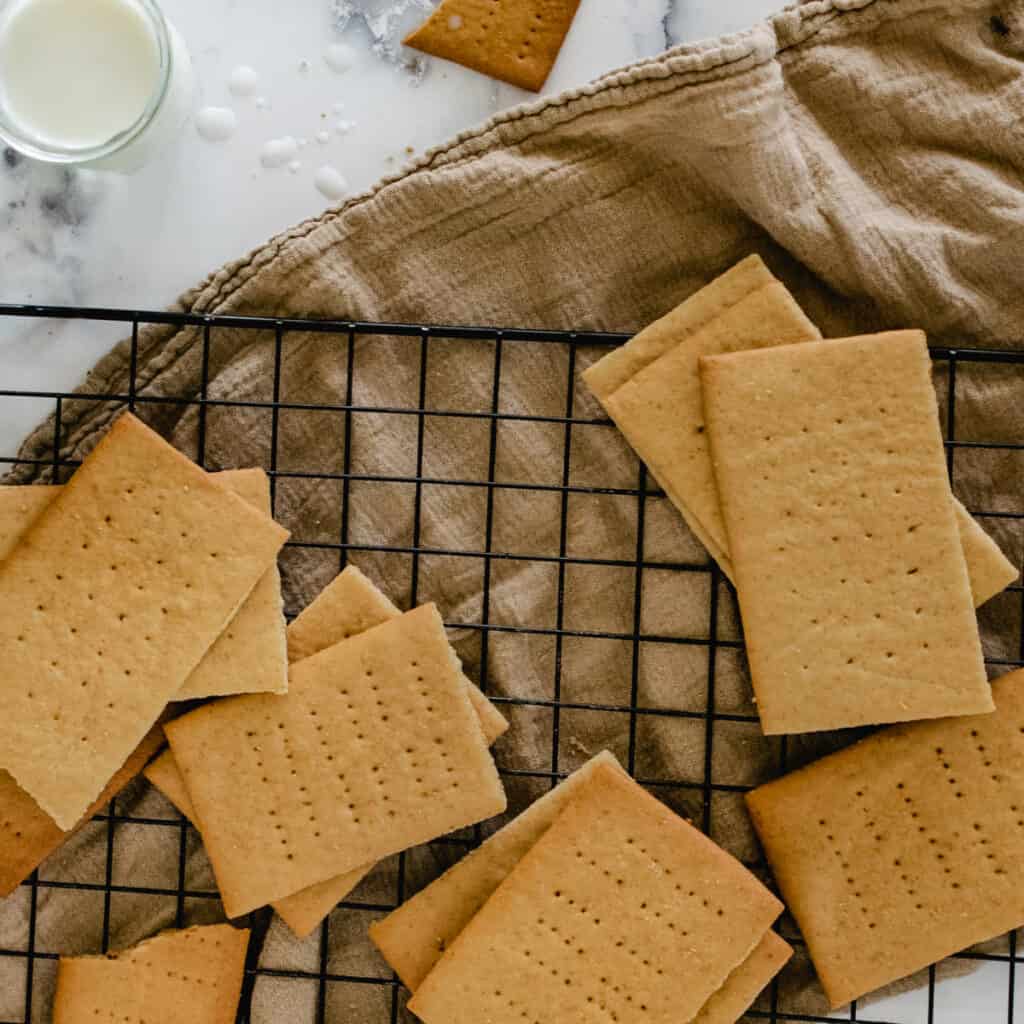
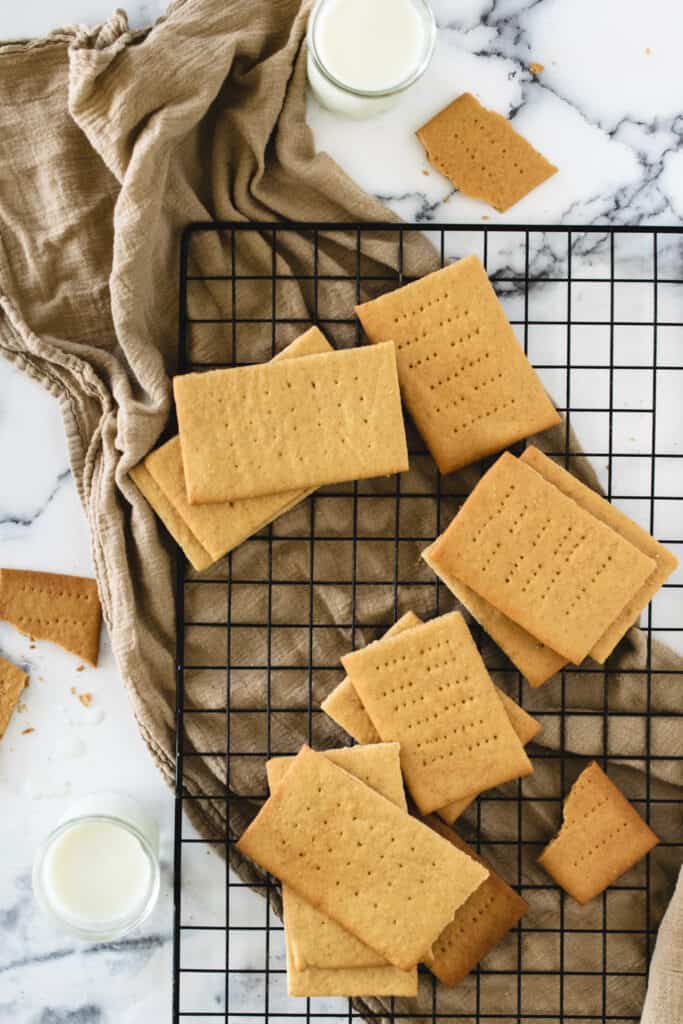
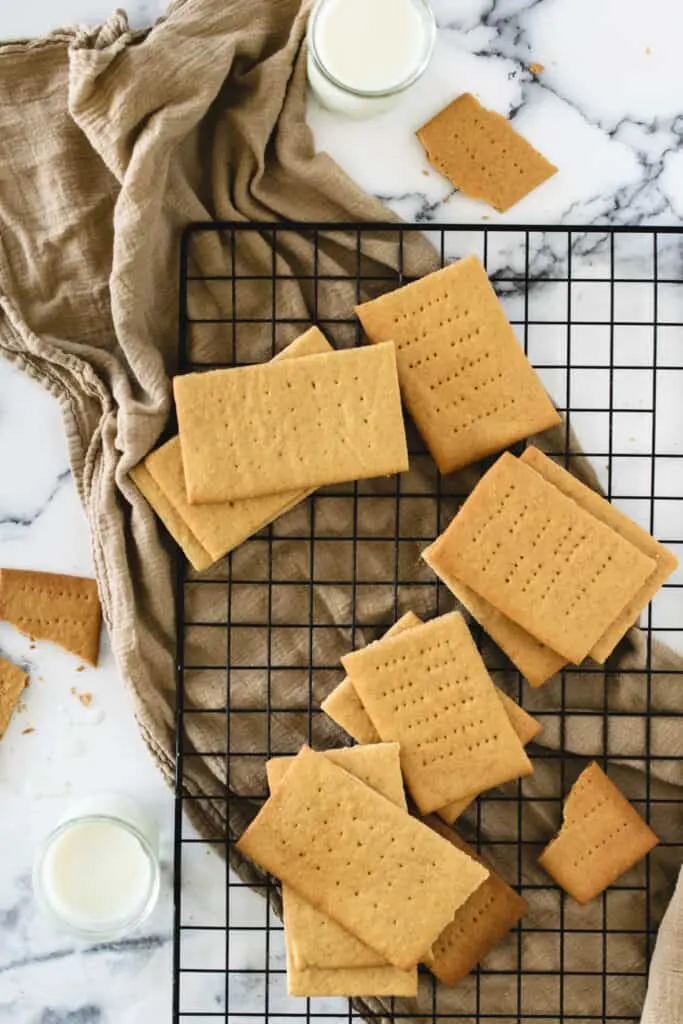
- Bake for 8-11 minutes until set. Remove them from the oven and let cool.
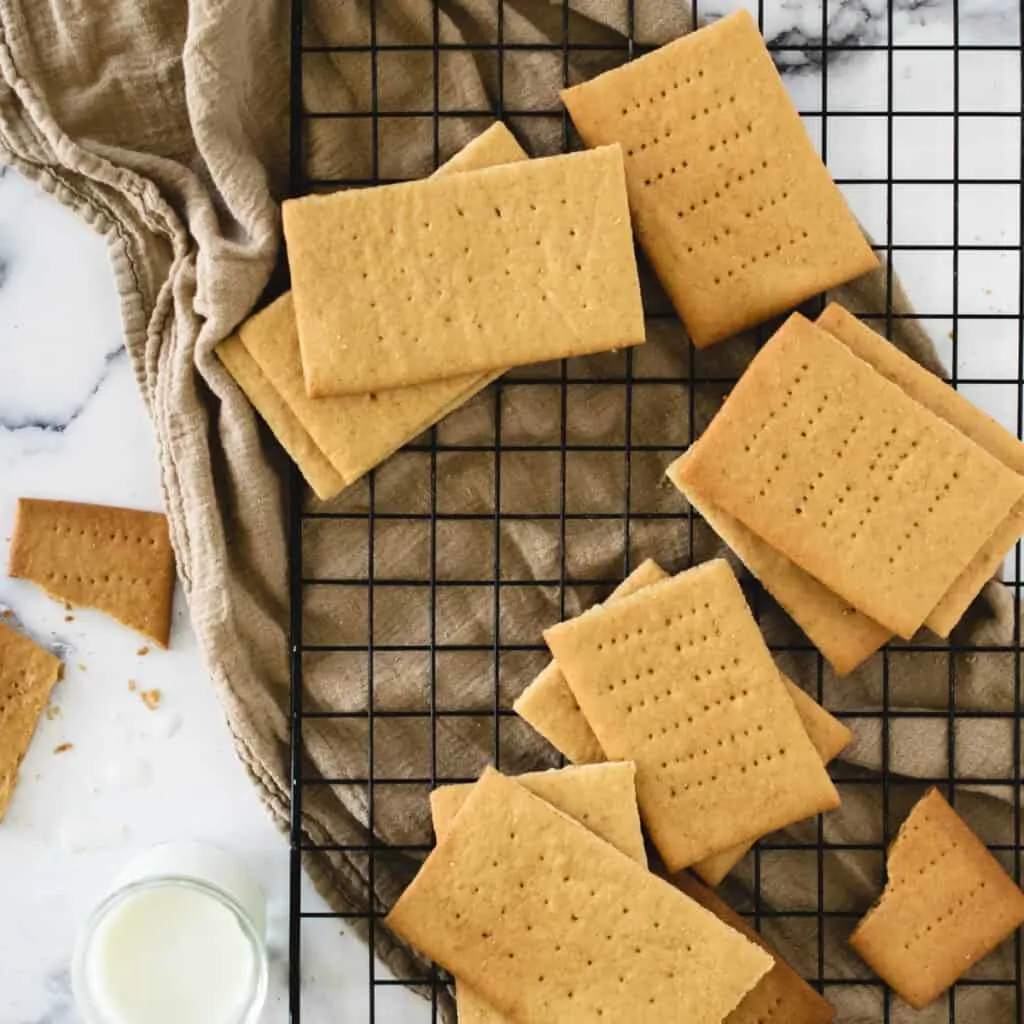
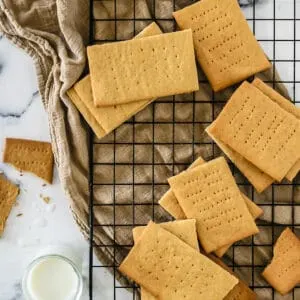
- Once cooled, re-cut the scored rectangles to release them into individual crackers.

Storage
The gluten free graham crackers should be stored in an airtight container in a cool, dry place at room temperature. They can also be frozen for up to 3 months.
For crunchy crackers with the best texture and flavor, enjoy these within 2 weeks after making them.
Can I bake multiple trays at once?
Yes, but if you choose to do this, make sure to rotate the trays halfway through the cooking time.
How big do I make the dough rectangle?
Roll the dough out using the baking tray as a reference and aim for a similar width and length to the dough sheet.

What brands of gluten-free graham crackers are there?
If you're short on time and want to run to the grocery store, make sure to look for a certified gluten-free graham cracker. Don't be surprised when you look at the price tag, you'll pay a pretty penny for delicious gluten-free graham crackers from the store.
Here are some gluten free brands:
- Annie’s Gluten-Free Graham Crackers
- Simple Mills Honey Cinnamon Thins
- Pamela’s Gluten Free Graham Crackers (may have a risk of cross contamination because of the facility that they're made in)
- Kinnikinnick Graham Crackers
- Schar Gluten Free Graham Crackers
There are a few more gluten-free graham cracker brands but these are the ones we have experience with.
Keep in mind that some graham crackers break easily in the box and some may taste a little more bland than others. I like making my own the best, especially when making other gluten-free recipes where I need crackers as an ingredient. I think this homemade recipe makes the best gluten-free graham crackers.

Recipe Tips and Variations
- This recipe for homemade gluten-free graham crackers uses honey and molasses, you can use maple syrup as well or use some maple syrup instead of the molasses. Additionally, you could use brown sugar or coconut sugar as well.
- If you like cinnamon graham crackers, you can add ground cinnamon to the dough mixture.
- Use these to make tasty ooey gooey s'mores for a real treat
- Use these crackers to make a gluten-free cheesecake with a graham cracker crumb crust.
- Make these as chocolate graham crackers by adding some cocoa powder or mini chocolate chips to the graham cracker dough before rolling it out.
- Substitute the honey with agave syrup for a vegan-friendly option if desired.
- These graham crackers also taste great when dipped in melted dark chocolate!
- If you want to get fancy, you can invest in a mini cookie cutter set or use a knife to cut out shapes instead of the traditional small rectangles.
Do I need any special equipment when making gluten free graham crackers?
Not necessarily! You just need a bowl to mix everything together and then a rolling pin to roll out the dough before cutting it into shapes.
Making the graham crackers gluten-free doesn't require anything crazy, just a few kitchen basics, and some hard work. Once you master the base recipe, feel free to experiment with different flavors and textures.
No matter what variation you choose, these homemade graham crackers will be a hit with your family and friends that taste just like your childhood favorites.

📖 Recipe

Gluten Free Graham Crackers
Equipment
- parchment paper
- baking sheet
- Pizza Cutter or sharp knife
- Oven
Ingredients
- 2 cups all purpose gluten free flour
- ⅔ cup brown sugar
- 1 teaspoon salt
- 1 teaspoon baking powder
- 1 large egg
- ¼ cup butter (½ stick)
- 1 tablespoon molasses
- 2 tablespoon honey
- 1 teaspoon vanilla
Instructions
- combine flour, sugar, salt and baking powder
- Add egg, butter, molasses, honey and vanilla until dough is formed
- Wrap in plastic wrap and chill for at least one hour
- Preheat oven to 325 degrees
- Divide dough into 2 or more portions. Roll the dough out between two pieces of parchment paper until it reaches a uniform thickness of ⅛th inch. (Do this directly on parchment paper.)
- Use a pizza cutter or non-serrated knife to cut rectangles and trim off excess dough. (Directly on parchment paper.) Save excess dough to incorporate into subsequent rolling.
- Transfer rectangles directly to baking sheet by lifting the parchment paper they are on, leaving them in place.
- Pierce holes with a fork or toothpick.
- Bake for 8-11 minutes until set.
- Once cooled, re-cut the scored rectangles to release them into individual crackers.
Notes
- Do the rolling and cutting directly on the parchment paper. Once you've removed the excess dough, lift the entire sheet of cut graham crackers to the baking sheet and leave them stuck together. They can be cut or broken where they are "scored" once they've baked and cooled.
- If baking multiple baking trays at a time, rotate them halfway through the cooking time.
- Wait until completely cooled to break apart, graham crackers will crisp up fully when cooled.
- Roll the dough out using the baking tray as a reference and aim for a similar width and length with the dough sheet.