By baking baking soda, you can make springy, chewy, alkaline noodles or ramen noodles at home.
Everyone loves ramen noodles, but they typical packages that are purchased at the store aren't so good for you.
Luckily, it's really easy to make your own by baking the baking soda and mixing that into these easy to make alkaline noodles.
The secret is in the "baked" baking soda, which is why these ramen-style noodles are also referred to as alkaline noodles.
By adding baked baking soda to the dough, you get a classic, chewy ramen noodle with an authentic bite, chew and flavor.
Ingredients
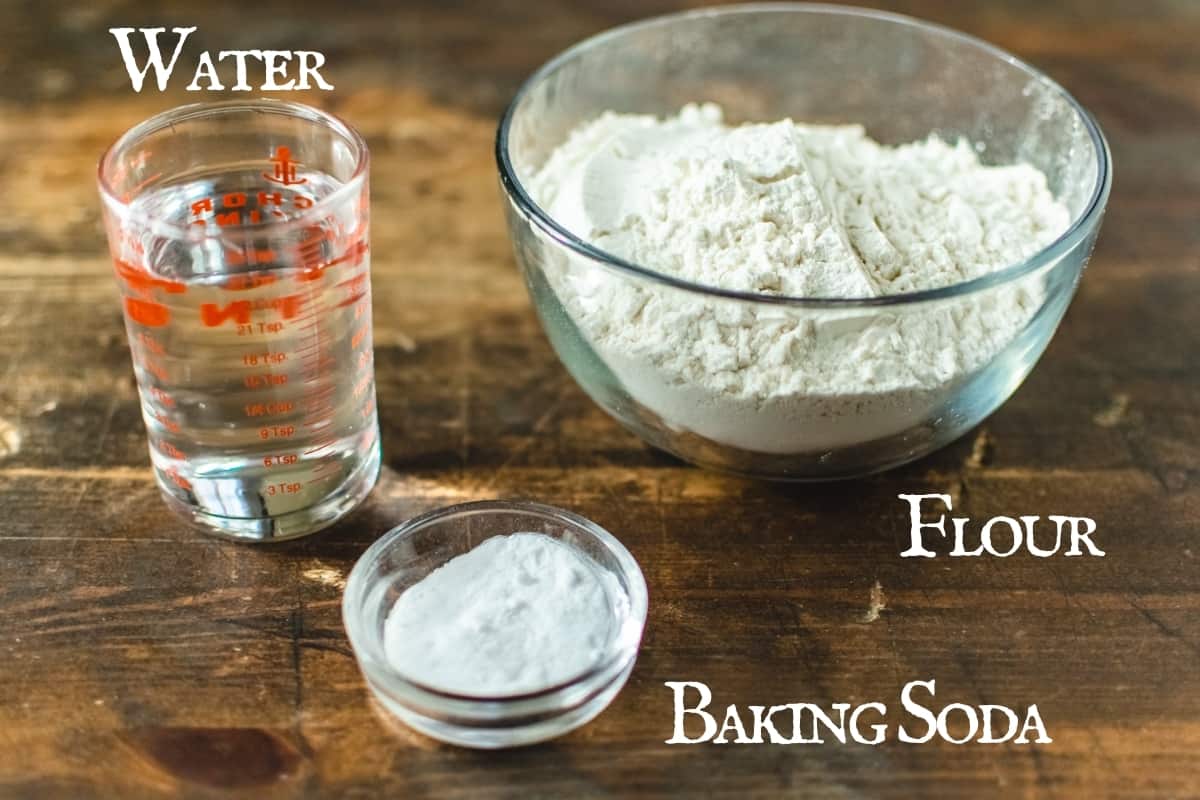

All-purpose flour works perfectly. Just make sure you're using wheat flour when making homemade ramen noodles.
The baking soda is just your typical run of the mill baking soda, any brand will do. When it gets baked is where the magic happens.
Baked Baking Soda
First you'll want to bake the baking soda.
Heat the oven to 250 degrees. Baking the baking soda turns it into a stronger alkali, making it ideal for preparing alkaline noodles.
Sprinkle a thin layer of baking soda over a baking sheet lined with paper.


Bake the baking soda for about an hour, undisturbed.
Remove it from the oven, let it cool, and store it in the pantry in a tightly sealed container.
It will last easily for a year, so you'll always have it on hand for making these delicious noodles.
Noodle Dough
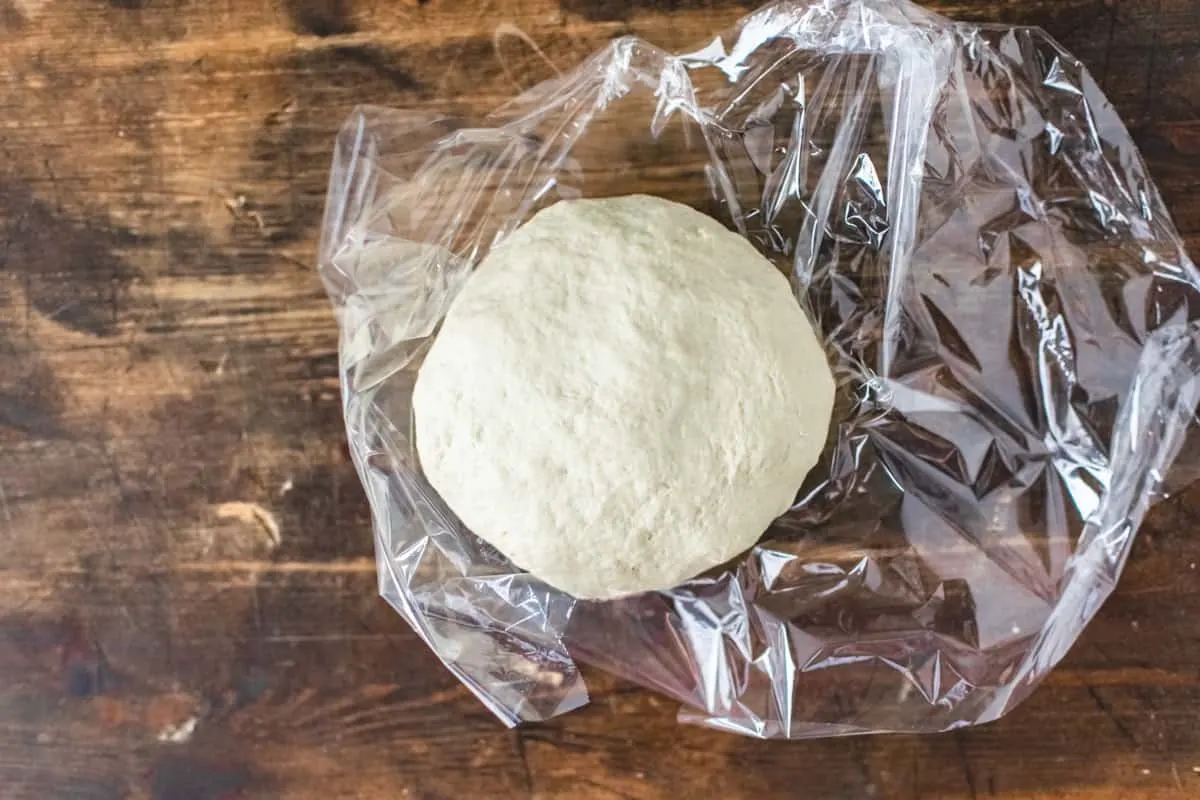
Combine the flour, baked baking soda and water.
A stand mixer with dough hook attached works best, but you can also use a food processor.
Once combined, let the dough rest for one hour at room temperature, covered in plastic wrap.
Allowing the dough to rest lets the glutens to relax, which helps with texture, but it also makes the rolling much easier because the dough is far less sticky.

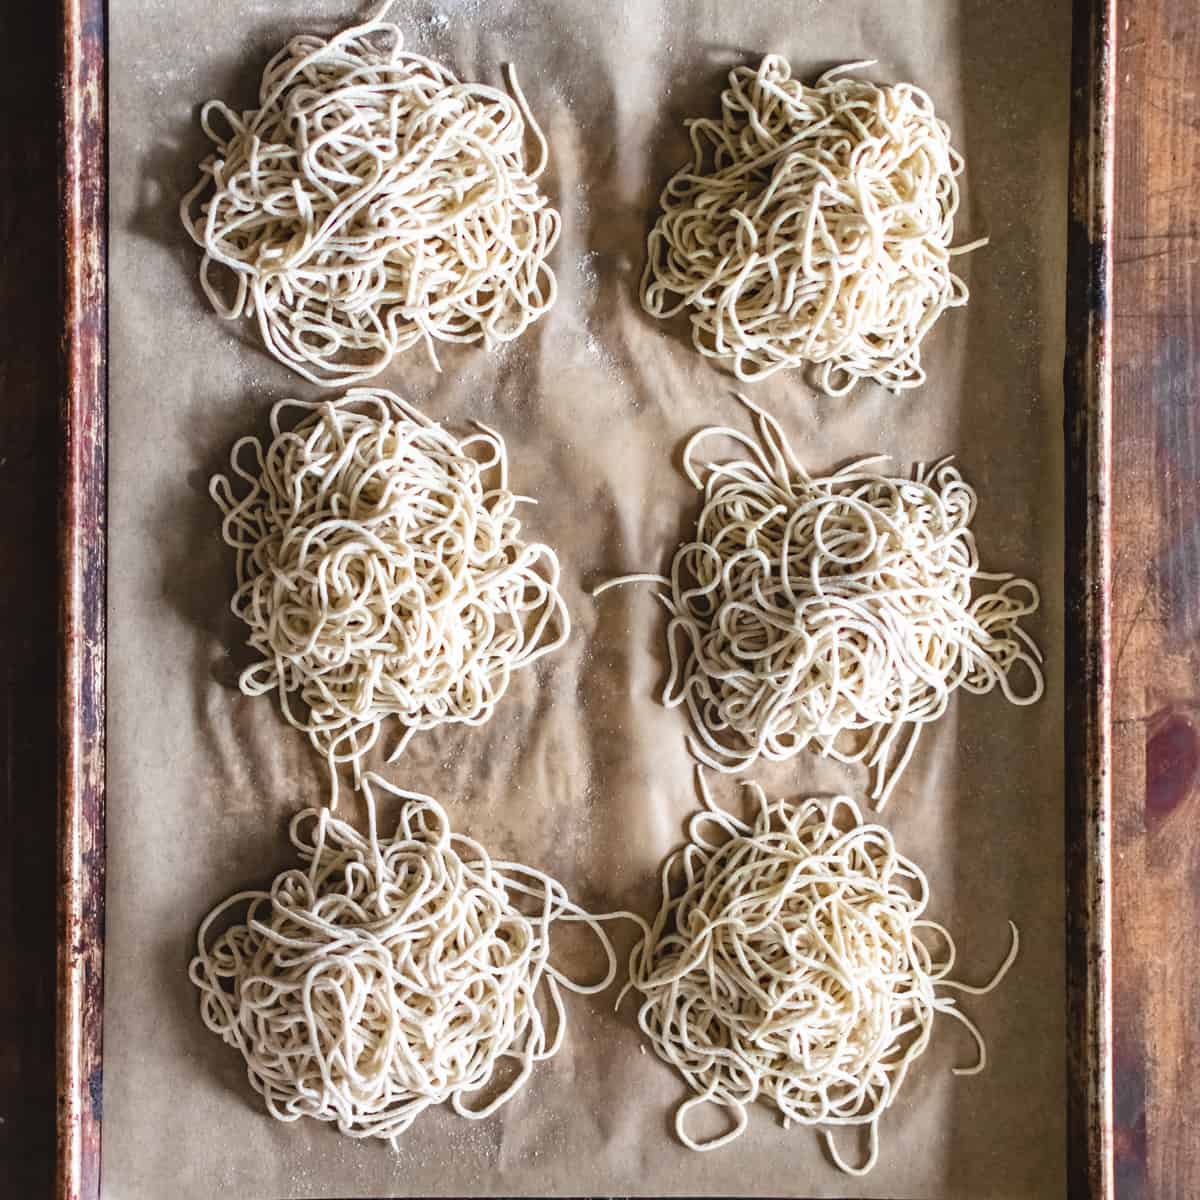
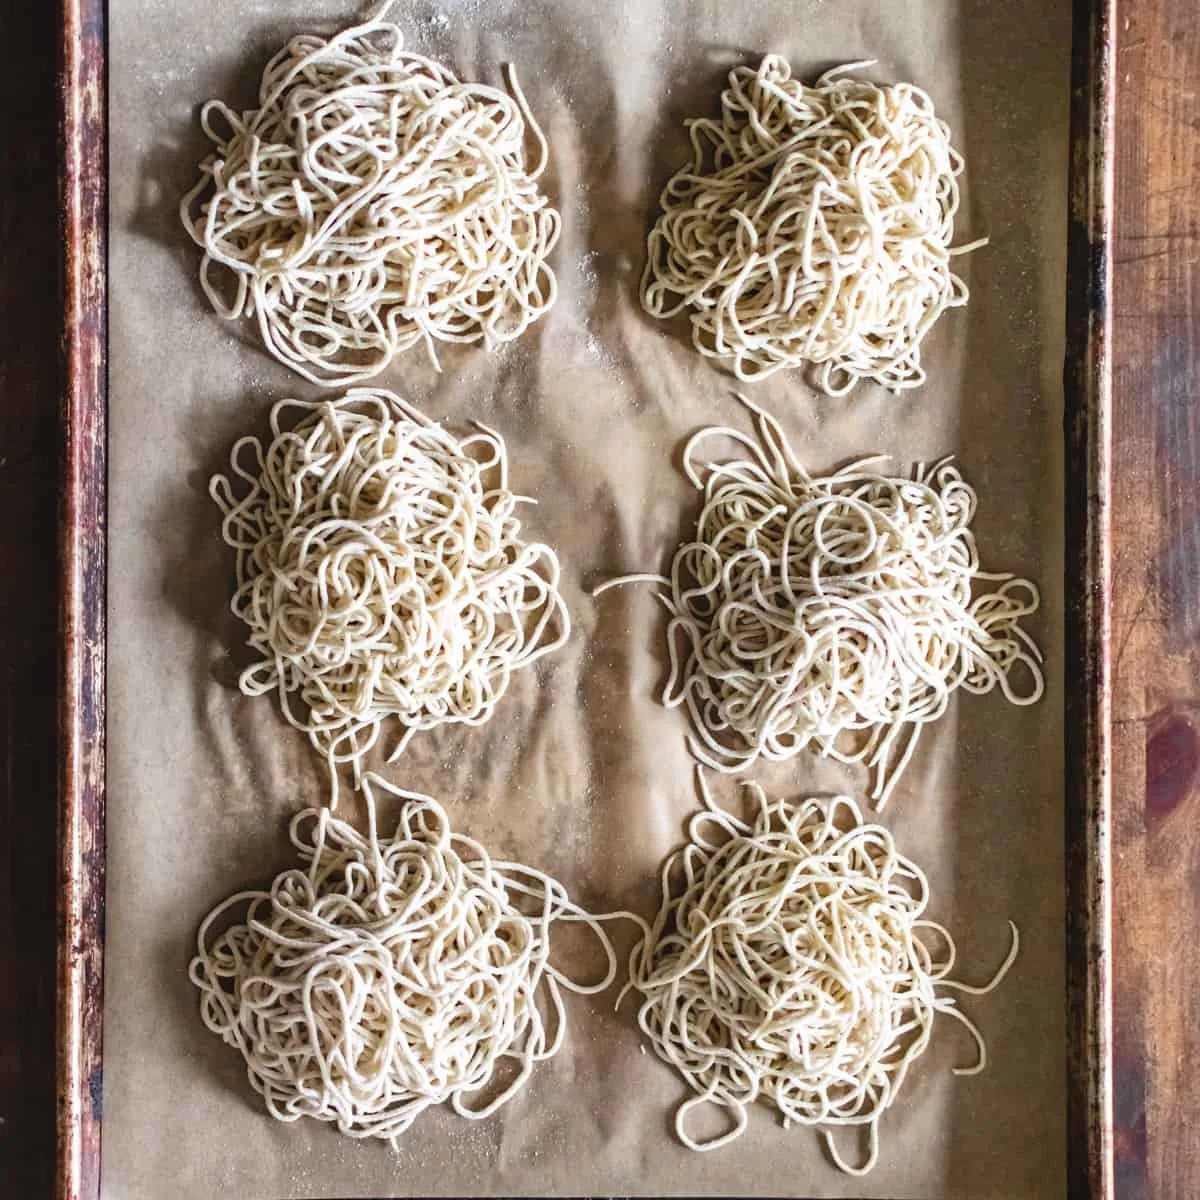
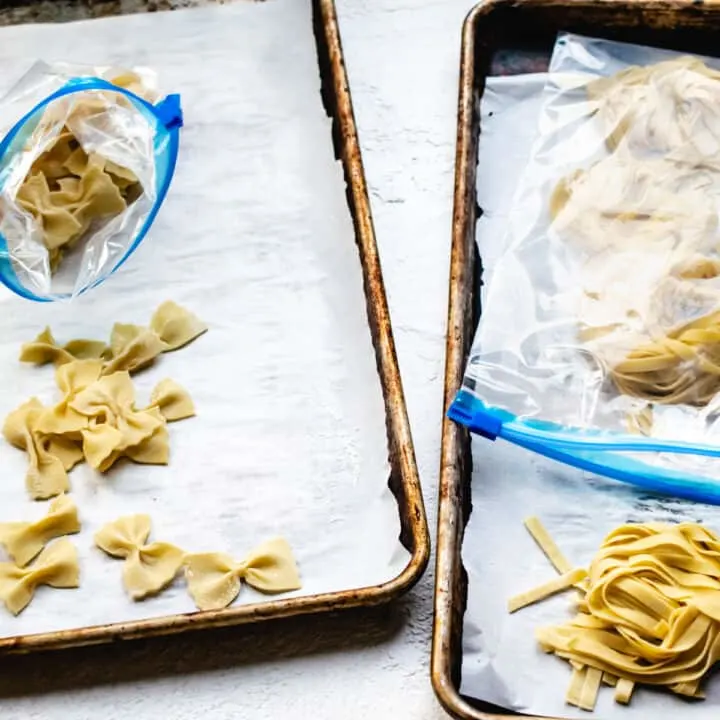
Divide the dough into 4-6 portions, as shown below.
Work on a lightly floured surface to avoid sticking. Working with one portion at a time, flatten a portion with your hand.
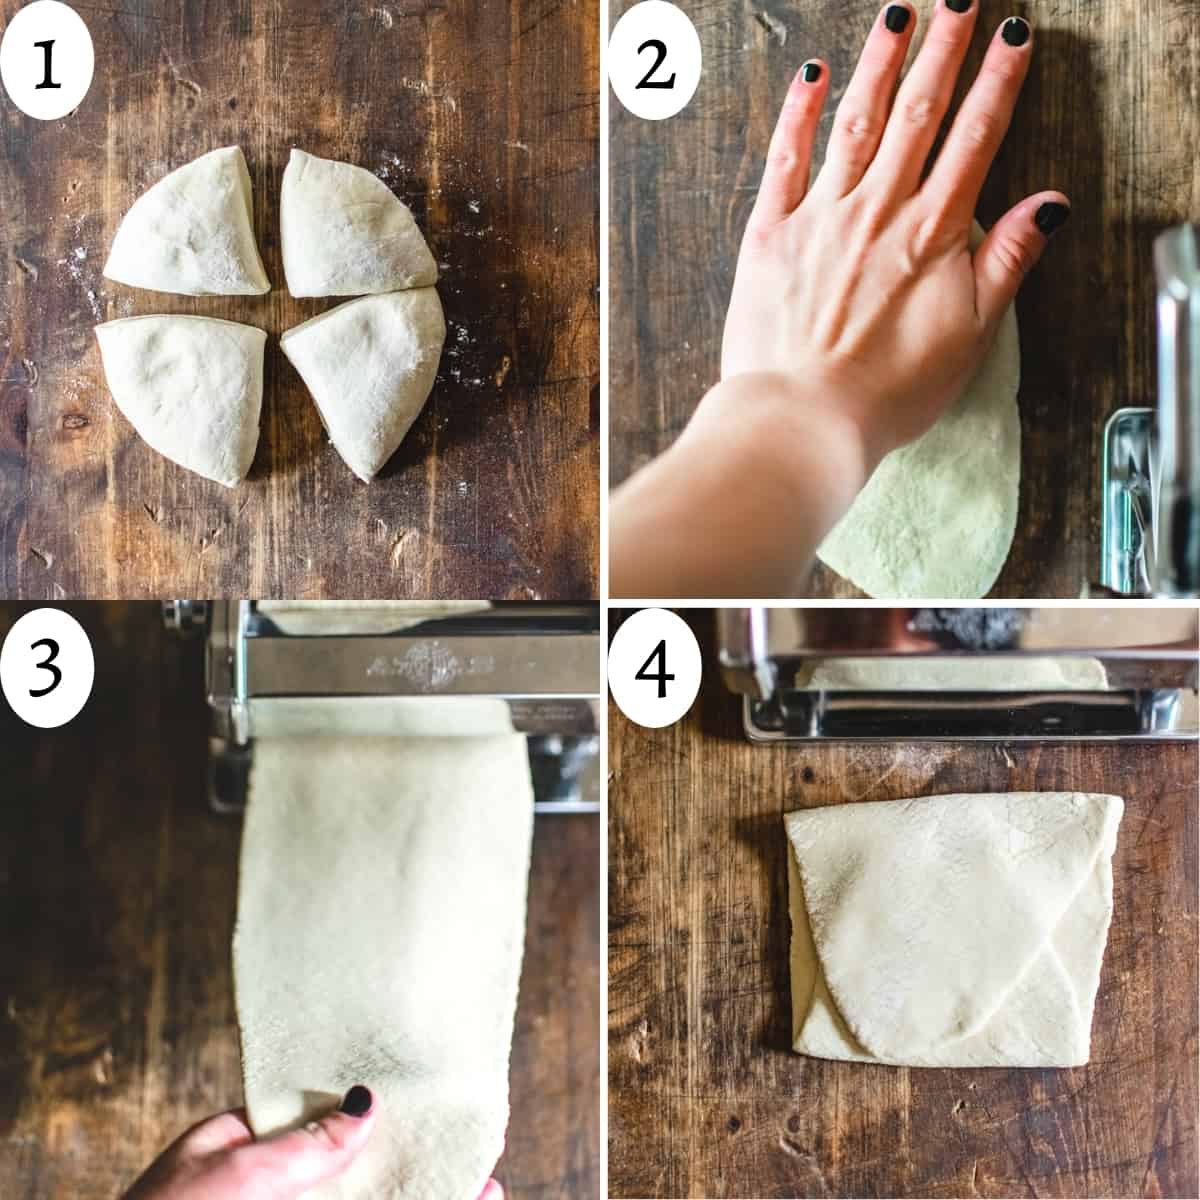

Feed the flattened dough through the widest setting of the smooth feed of your pasta roller.
Fold both ends toward the center. Turn on quarter turn, and feed back through. Repeat this process three more times.
Continue feeding through the roller, each time adjusting to the next thinnest setting until you've reached between 2 and 3 millimeters thick. This is around the 5 to 6 number setting on most pasta rollers.

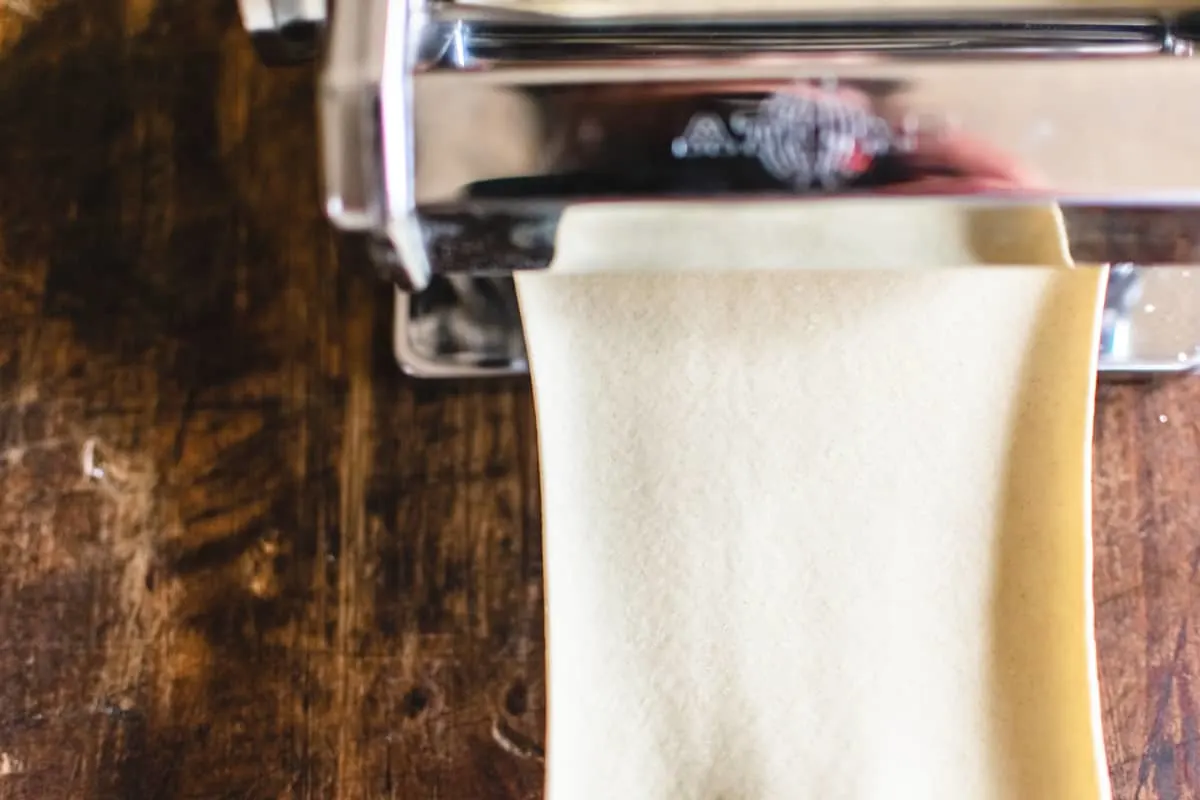
Repeat with remaining portions and allow sheets to dry out for 20 minutes.
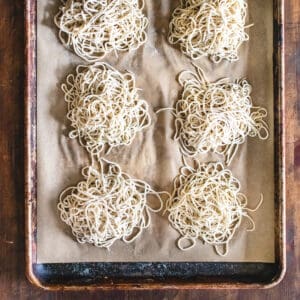
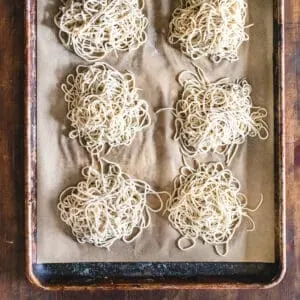
Feed the semi-dried sheets through the spaghetti cutting side.


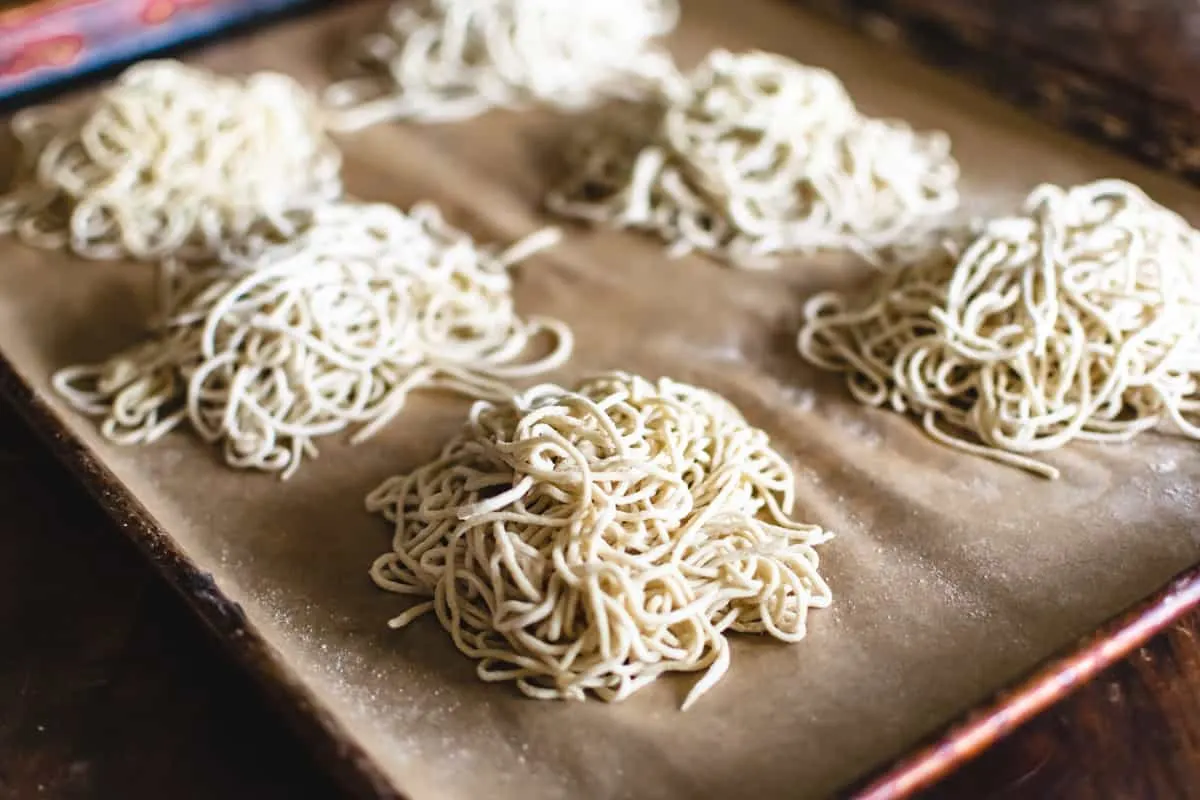
Lightly dust the strands with flour and toss a little bit. Arrange them in small piles until ready to cook.

Cooking the Noodles
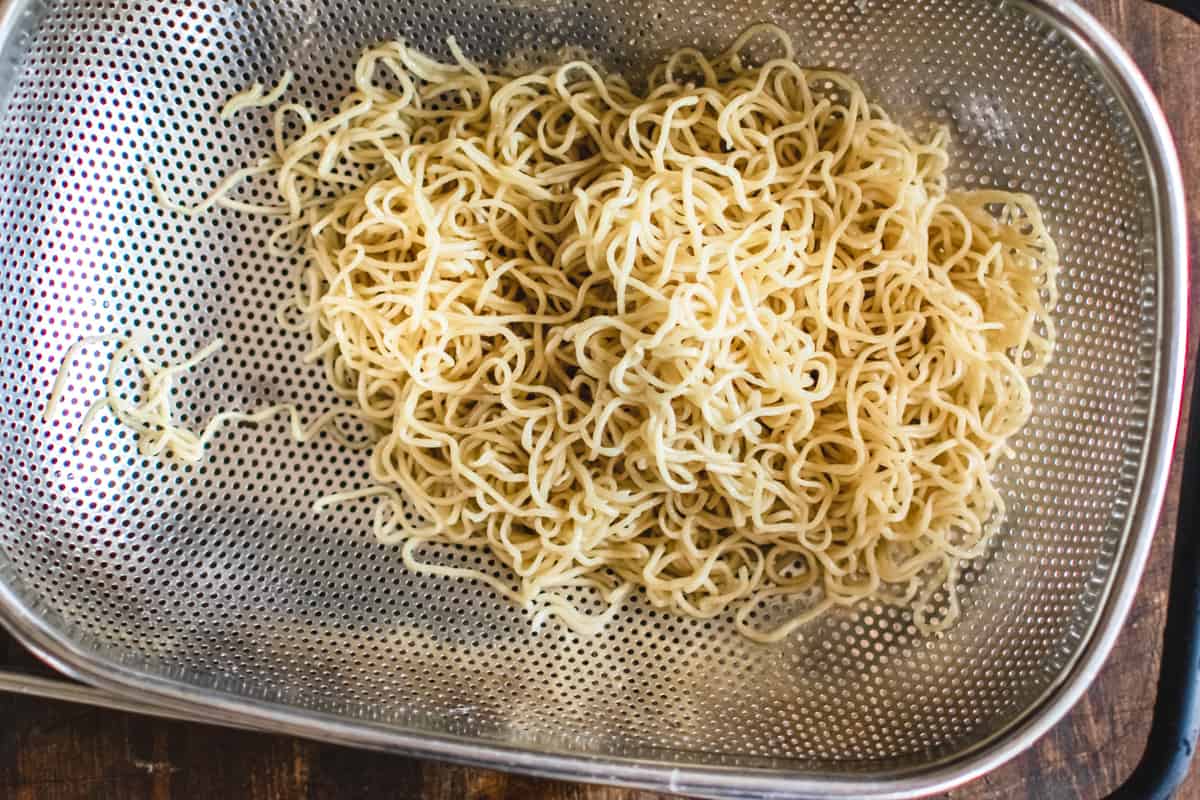
Cook the noodles in boiling water for no more than 2 minutes, until tender but still chewy.
Strain the noodles and shock with cold water to halt any carryover cooking.

Tips
If the noodles are sticking together when rolling the pasta dough sheets through the pasta roller, then the pasta sheets might be too moist still.
If this is the case, continue to feed the pasta sheets through the roller to desired thickness, but allow the sheets to air dry for an additional 20 minutes before rolling through the pasta cutter feed.
In addition, sprinkle the sheets with additional flour to help avoid sticking.
Serving
Stir fry noodles in your favorite sauce on a hot skillet along with other ingredients like meat and vegetables to make a delicious stir fry dish.
Or, to make ramen bowls, start by piling the noodles into bowls, and top with fresh vegetables and/or seared meat. Ladle savory broth over the noodle bowls, and garnish as desired.
Toppings to consider are hard (or soft) boiled eggs, sesame seeds, spinach, mushrooms, scallions, cabbage... there are truly an infinite amount ways to enjoy these noodles.


If you tried these alkaline noodles, and made ramen noodles or stir fry, leave a comment below!
Related recipes are below.

📖 Recipe
Alkaline Noodles (a.k.a. Ramen Noodles)
Equipment
- Pasta Roller
- Stand Mixer or Food Processor
Ingredients
- 3 ½ cups all purpose flour
- 2 teaspoons baked baking soda
- 1 ½ cups cold water
Instructions
- (To make baked baking soda: sprinkle soda onto a parchment lined baking sheet and bake at 250 degrees for one hour. Reserve 2 teaspoons for recipe, store remainder in an airtight container in cool pantry.)
- Combine flour, baked baking soda and water in a stand mixer with dough hook or food processor. If the dough is too sticky, add more flour one tablespoon at a time. If it's too dry, add 1 tablespoon of water at a time. Dough should become smooth and pull away from the sides of the bowl, forming a ball.
- On a floured work space divide dough into 4-6 portions.
- Working with one portion at a time, flatten portions with hands and feed through widest setting of smooth side pasta roller; fold and repeat 3 times. Feed through next thinner setting, and subsequent settings once until you reach a 2-3 millimeter thickness (about a number 5 or 6 on most machines). Allow sheets to air dry for at least 20 minutes side by side (not stacked). If necessary, sheets can be cut in half so they're easier to work with.
- Feed through the spaghetti setting, flour the strands and set aside while you continue to work on each batch. Toss strands in a bit of flour and make 4-6 piles as you go.
- To cook the noodles, bring a large pot of water to a boil and salt generously. Boil noodles for 1-2 minutes. Strain immediately in colander, and rinse with cold water until cooled.
Notes
- Baked baking soda can be stored in an air tight container in the pantry for up to one year.
- Don't overcook noodles, 2 minutes is the max, if cooking in a broth, only cook 1 minute as there will be some carryover cooking in the warm broth.
Kalena
Sunday 21st of March 2021
These look amazing! I can't wait to try them. I generally buy the ramen noodles and just toss the seasoning packet but making them myself will be so much better.
Corey
Monday 21st of December 2020
The best !!!
Erin
Wednesday 23rd of December 2020
Thanks Corey!