How to make Instant Pot bone broth (or pressure cooker bone broth), using frozen bones, plus how to store it in the freezer, refrigerator, or pantry.

Making bone broth on the stove top is easy and produces a very flavorful broth, but using an electric pressure cooker (i.e. Instant Pot), is so much quicker.
The reason being, is that the stove top method takes all day long. At least 12 hours.
But in a pressure cooker, it only takes 2-3 hours max.
Are bone broth and stock the same?
Chicken broth and chicken bone broth are not the same. (This is true for any meat variety in, not just chicken.)
Broth is made from the meat portion, usually from boiling it, or simmering it in a liquid, and the resulting flavored liquid is the broth.
Bone broth on the other hand, is actually just a long-cooked stock.
Many trained chefs and experienced home cooks argue that stock and bone broth are the exact same thing.
From this, we can extract that bone broth is at the most, just a longer cooked stock.
The process of making bone broth and stock are the same.
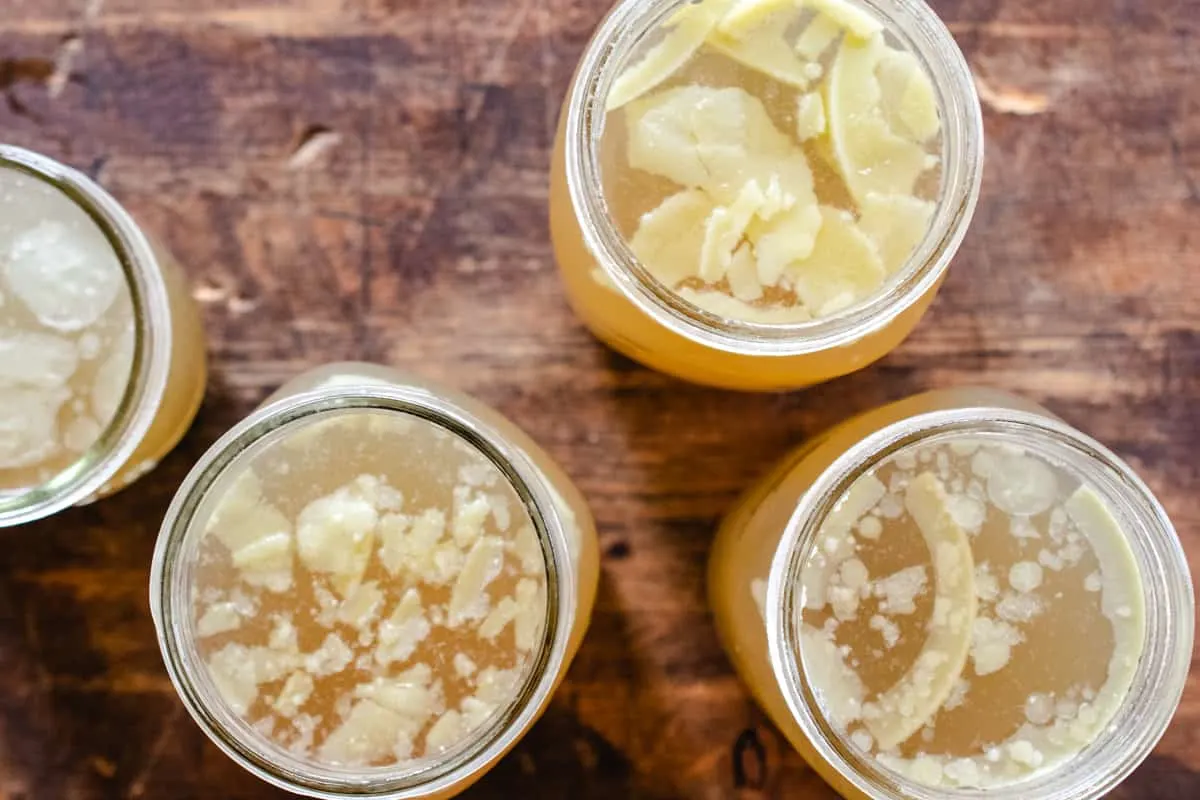
Either way, the stock/bone broth is very good for you. The resulting gelatinous content will tell you how good of quality stock/bone broth you have.
Why is Bone Broth Gelatinous
A stock or bone broth that has a consistency like jelly has a higher collagen content.
That's what makes it turn to gel. It's not fat.
Whatever you do, do not throw that out. You want that. You won't know if it's gel-like until it has cooled off.
A stock/bone broth that sets and remains looking like broth or a somewhat liquid-like consistency, lacks a good deal of collagen and micro-nutrients which make consuming bone broth as a health benefit so appealing to people these days.
The resulting quality is determined by the bones themselves, and how long you've cooked them.
Bone broth will not become gelatinous until it has completely cooled, so you may not be able to see this until the next day.
Why Make Bone Broth in the Instant Pot
- It's faster than leaving it on the stove or in the slow cooker all day
- It has various health benefits
- You can make some to use now or keep it on hand in shelf stable mason jars for later
- It's not full of artificial ingredients or preservatives like the stuff you buy at the store is
- It's a great way to use up an extra rotisserie chicken and scrap vegetables from other recipes to help lower food waste
Ingredients Needed
You only need a handful of ingredients to make your own homemade broth using this Instant Pot Bone Broth recipe.
- water
- chicken bones or beef bones and parts fresh, frozen, or cooked
- vegetable scraps and ends, optional
- salt and pepper, optional
- bay leaves, optional
How to Make Instant Pot Bone Broth
The quality of homemade stock is generally superior to store bought.
It takes anywhere from a day to two days to make good stock on the stove top, but thanks to the electric pressure cooker, this process can be whittled down to just a few hours.
First, we will go over the general process of each group of steps, then I'll give you a step by step instruction set on what to do so you can make the best bone broth.
The bones
No matter what bones you use to make it, the process is the same.
You can use already roasted bones, like from a whole chicken that you roasted in the oven, or you can use raw bones.
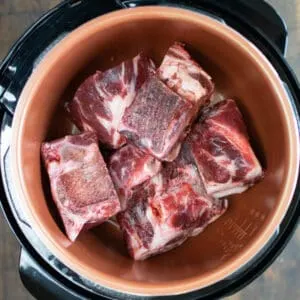
You can also use frozen bones, no need to defrost. It may just add a little time to the cooking time, but not much.
You can load the pressure cooker with as many bones as will fit within the cooker's maximum fill line.
Add ins, are optional and can be for the purpose of adding flavor, or just to eliminate waste that would otherwise go unused. Or both!
Some examples of what you could toss in are:
- Onion scraps, ends and peels
- Carrot scraps and ends
- Celery leaves and scraps
- Leftover herbs, whole peppercorns, or garlic peels
- Salt is optional: I never salt my stock, as I like to have control of that when I cook with it later. If you are planning on drinking your bone broth for health benefits, and not cooking with it, then go ahead and add some salt to taste.
- Apple cider vinegar, or white vinegar: it is said that adding an acid like vinegar helps to extract the nutrients and marrow from the bones, but I rarely do this and still end up with a very Jello-like result
- Bay leaves
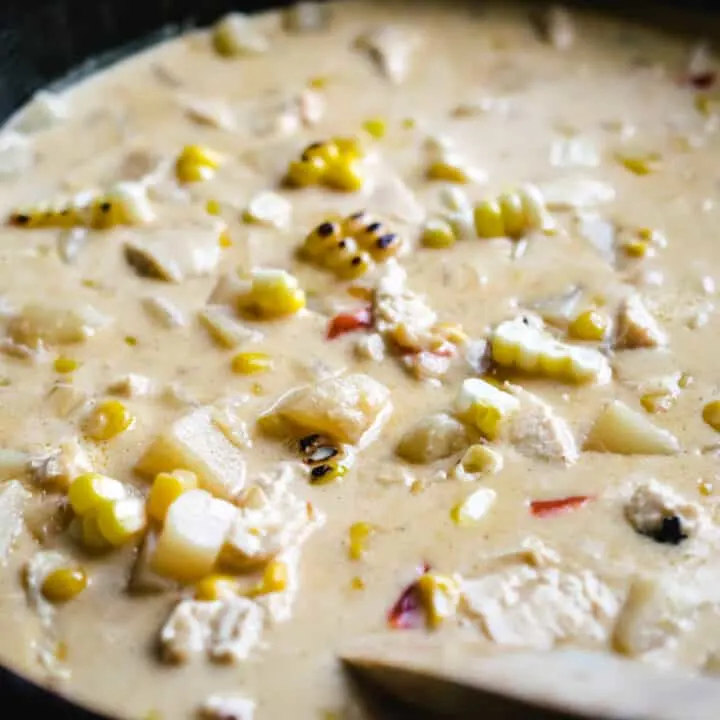
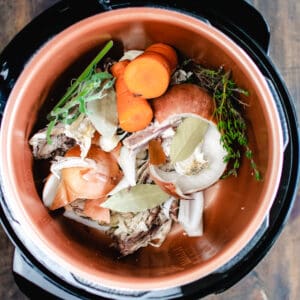
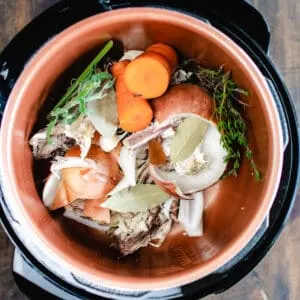
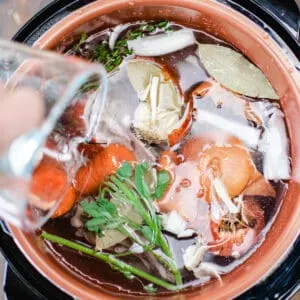
The photo on the left (photo 1) is stock being made from a whole chicken carcass, that was left from our roast chicken dinner. I added extra vegetable peels and scraps for more flavor. It's also nice to be able to use scraps up! Everything gets strained out in the end, leaving a clear, clean chicken stock.
The photo on the right (photo 2) is showing raw beef bones, that the butcher has already cut the meat off of. The bones were otherwise unusable.

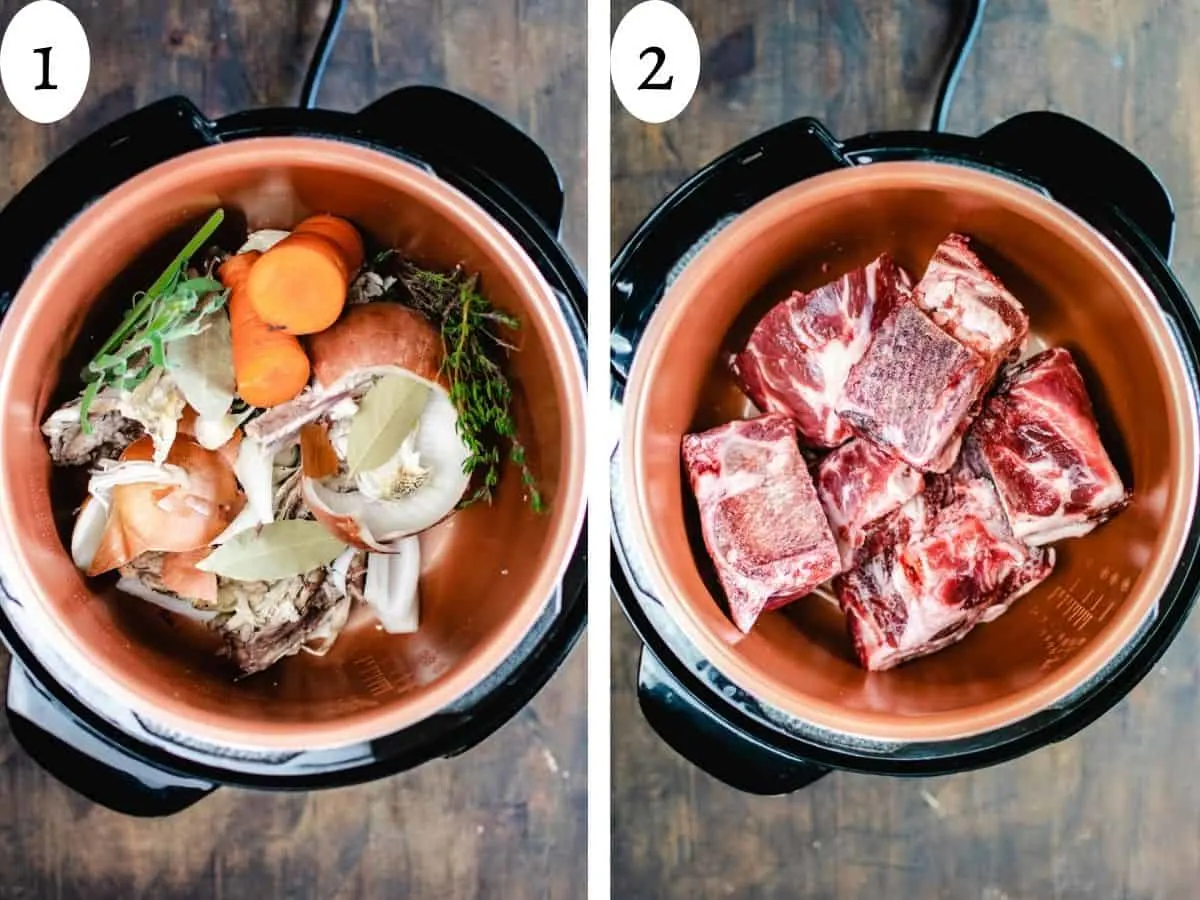
If you choose to add extra vegetables or herbs (add ins) for flavoring, put those on top.
This is a great way to get rid of extra scraps from the fridge, and there's no need to trim them.
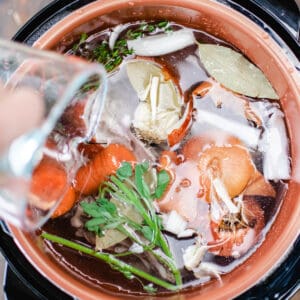
Just estimate the water, and pour in enough to cover the frozen bones.
After the bones, and any optional add-ins are in the pot, fill the pot with water.
Don't exceed the max fill line. A good rule of thumb is to aim for the water to be level with the bones.
Keep in mind that the more water you use, the more thinned out your stock will be. Conversely, using say, half that amount will result in a denser, richer stock.
Time
The minimum recommended time for pressure cooking bone broth is 2 hours, however 3 hours will yield a richer, more colored bone broth.
This does not include the time for the pot to come to pressure.
Add 30 minutes if you are using frozen bones. This is at high pressure.
If your pot has a maximum pressure cooking time of 2 hours or less, it's fine to do another cycle afterwards.
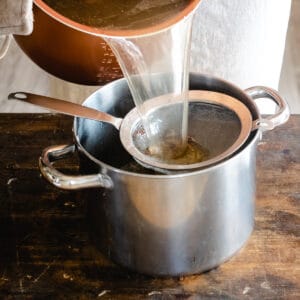
Let the pot release pressure naturally before opening. The stock will be very hot, don't attempt to strain it before it cools significantly.
Strain
After the bone broth has cooled slightly, remove the bones and large pieces with tongs and discard them.
Tip: You can save the beef bones to give to your pets, just avoid giving any animal chicken bones.
What are the best bones for bone broth?
Some feel that when it comes to making bone broth, the best leftover bones to use are typically from healthy animals that have been grass-fed. But if you don't have access to grass fed animal bones, don't fret, use what you have to make your own bone broth.
Beef bones, such as marrow bones and knuckle bones, are generally preferred over chicken bones due to the higher collagen content.
But it is totally fine to use chicken bones!
In addition, it's best to look for organic bones if possible, since non-organic bones may contain hormones or antibiotics.
Lastly, avoid giving any animal chicken bones because they can splinter and cause damage to the animals.
By using the right kind of bones, you can maximize the nutritional benefits of your bone broth while ensuring a delicious flavor.
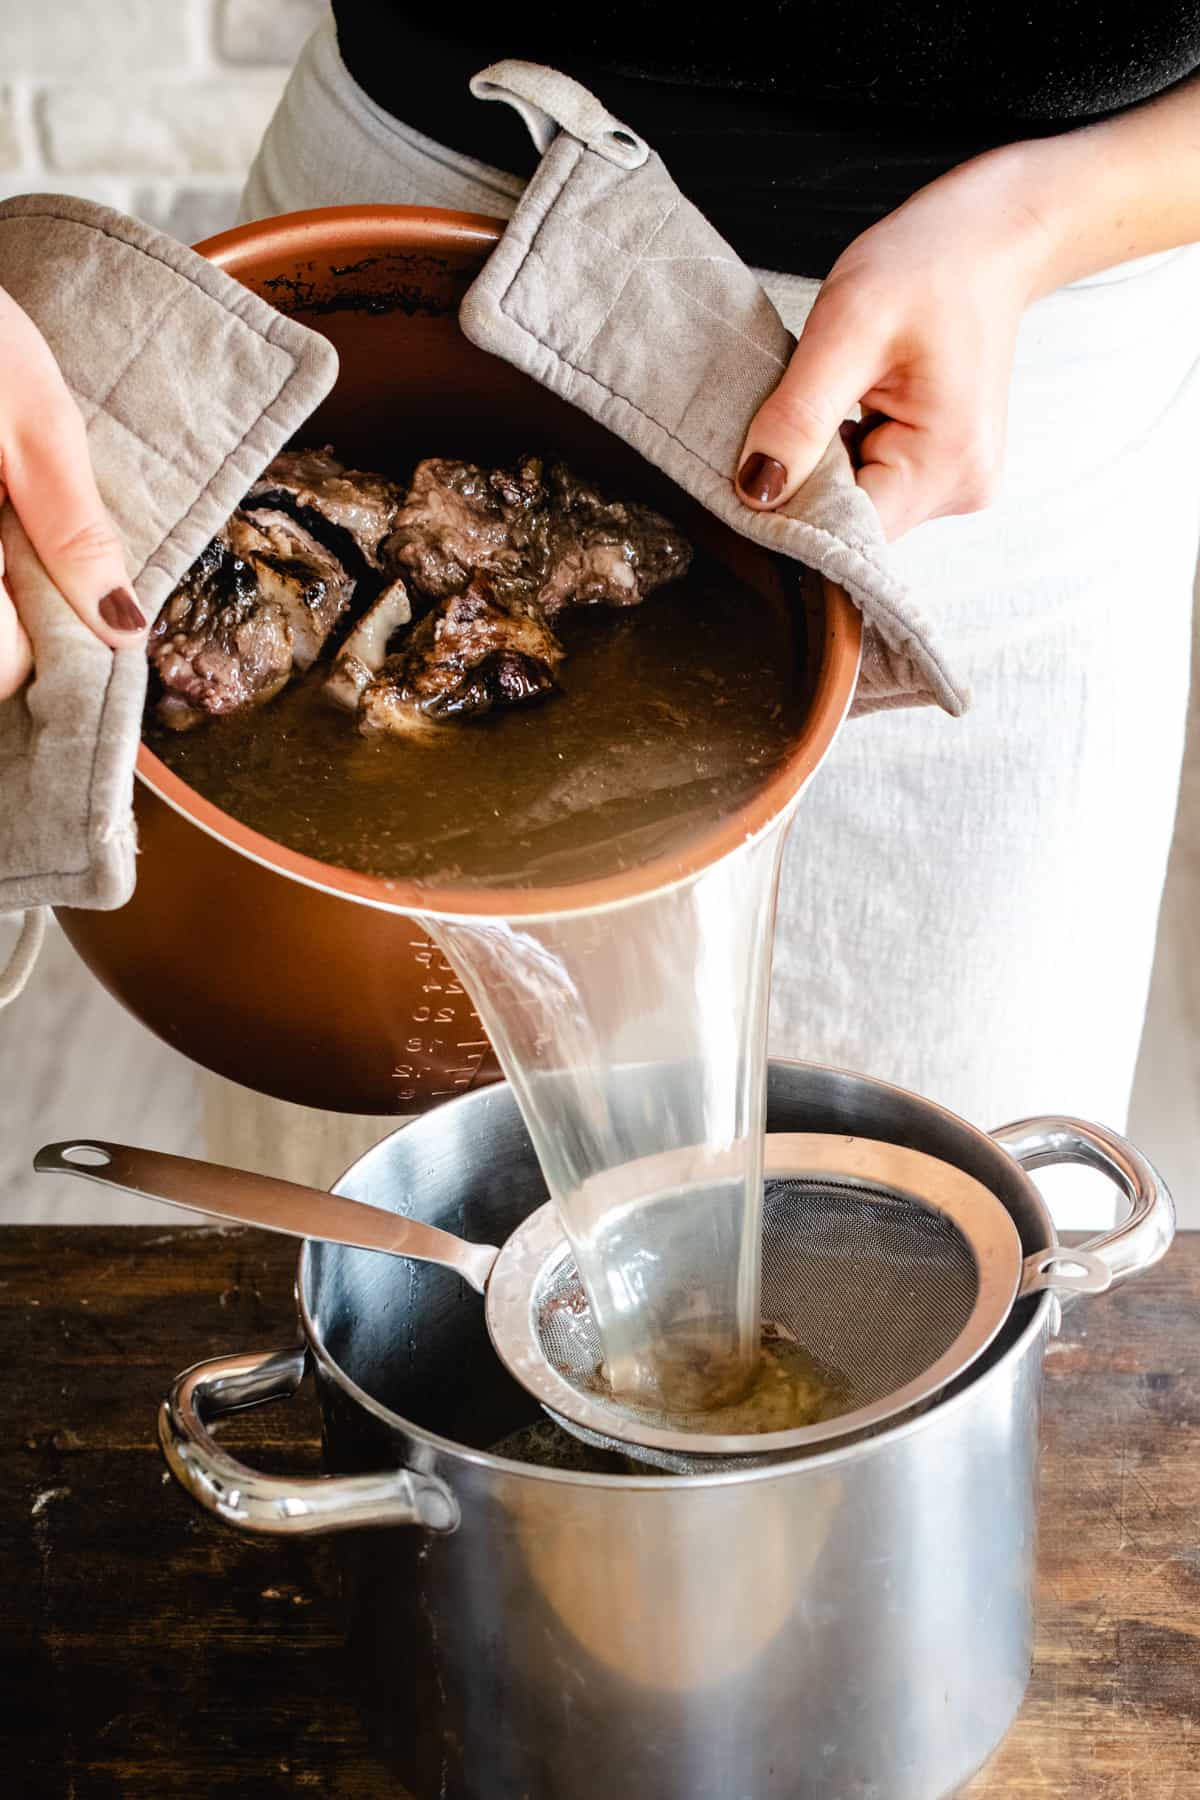

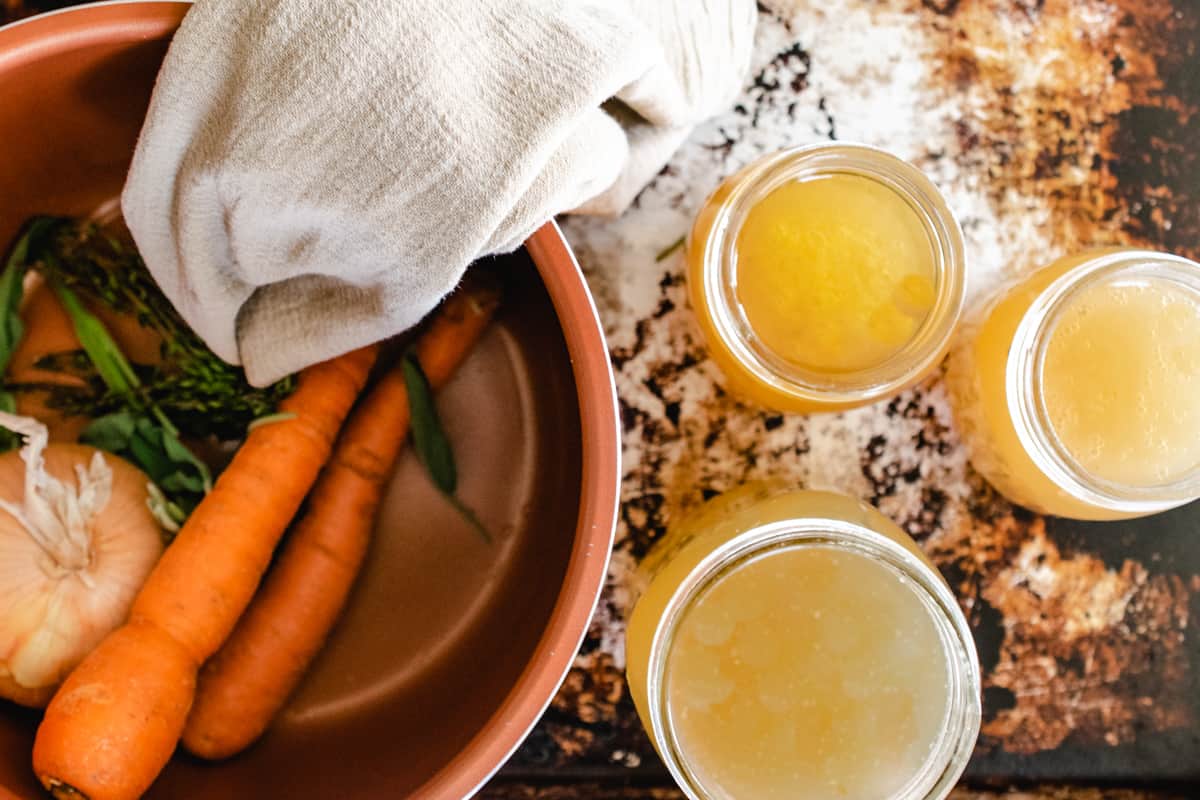
With the large pieces removed, strain the liquid through a fine mesh strainer into a large bowl or container to remove extra pieces and debris.
You should have a clear, yet golden or amber colored broth.
Although the bone broth looks clear, it may still contain fat.
It is fine to keep the fat, but to remove it is very easy.
This can can be done before the storing process, or after when you actually go to use a portion of it.
Remove the Fat
Removing the skin from you chicken carcass, for example, will eliminate a lot of unwanted fat from the beginning.
However, you may still end up with some unwanted fat content that you may want to remove.

An easy way to do this, is to let the strained bone broth set in the fridge.
The fat will separate and rise to the top and form a "cap" that can then be easily removed with a spoon.
If you choose to remove the fat before storing, strain the stock into one large container to let the fat separate and harden.
Divide the bone broth into portions for storing after the fat is removed .
It's possible that your stock doesn't contain a significant amount of fat, so you may not even need to any.
If you want to remove the fat as you use the portions of stored bone broth, you can do so at any time.
You can do this with bone broth that has been moved from the freezer to the fridge to thaw.
Frozen bone broth should be thawed safely in the fridge or defrosted in the microwave.
As the stock thaws the fat will still remain solid and can be removed from the top of the liquid.
How to Make Bone Broth Using the Instant Pot
- Place the bones or chicken carcass in the pressure cooker.
- Top with add ins, if you have chosen to use them. (Vegetable scraps and ends like onion, garlic, carrot nubs, or even fresh or dried herbs; optional.)
- Cover the bones with enough water. Use 16-24 cups (1-1 ½ gallons) depending on desired strength of bone broth. That's 16 cups (1 gallon) for stronger bone broth, or 24 cups (1 ½ gallons) for lighter bone broth.
- Seal the electric pressure cooker as directed and set on manual setting to high pressure for 2-3 hours time. 2 hours for lighter broth, 3 hours for stronger. Don't go over 3 hours, as that can be too long.
- Allow the pressure cooker to release steam naturally, carefully remove lid away from face and let cool.
- Pour the cooled broth through a fine mesh screen to strain out pieces. (Use either one large pot to divide the bone broth up later, or pour directly into storage jars.)
- Chill the strained stock in the fridge to allow fat to solidify and separate, then skim it off the top to remove from stock.
- Store properly for the best bone broth.
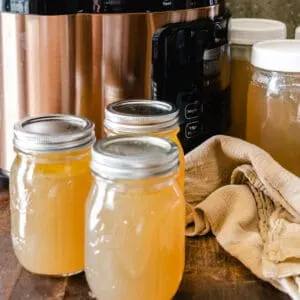
Storing Homemade Bone Broth
Store in the fridge for 3-4 days or the freezer for up to six months.
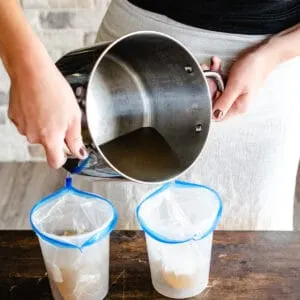
An easy, space saving way to do this is using stackable zip lock freezer bags.
Using glass jars or plastic containers helps to sturdy the plastic bags for pouring.
Line the containers and fold the tops over the rim. This helps to hold the shape while pouring.
Be sure to leave a couple of inches of head space to allow room for expansion and to zip up the bag.


Once the bags are full, seal them and lie them flat on a baking sheet.
Freeze your delicious broth this way in a freezer bag until solid, then remove the baking sheet and stack the flat, frozen bags any way you wish in the freezer.
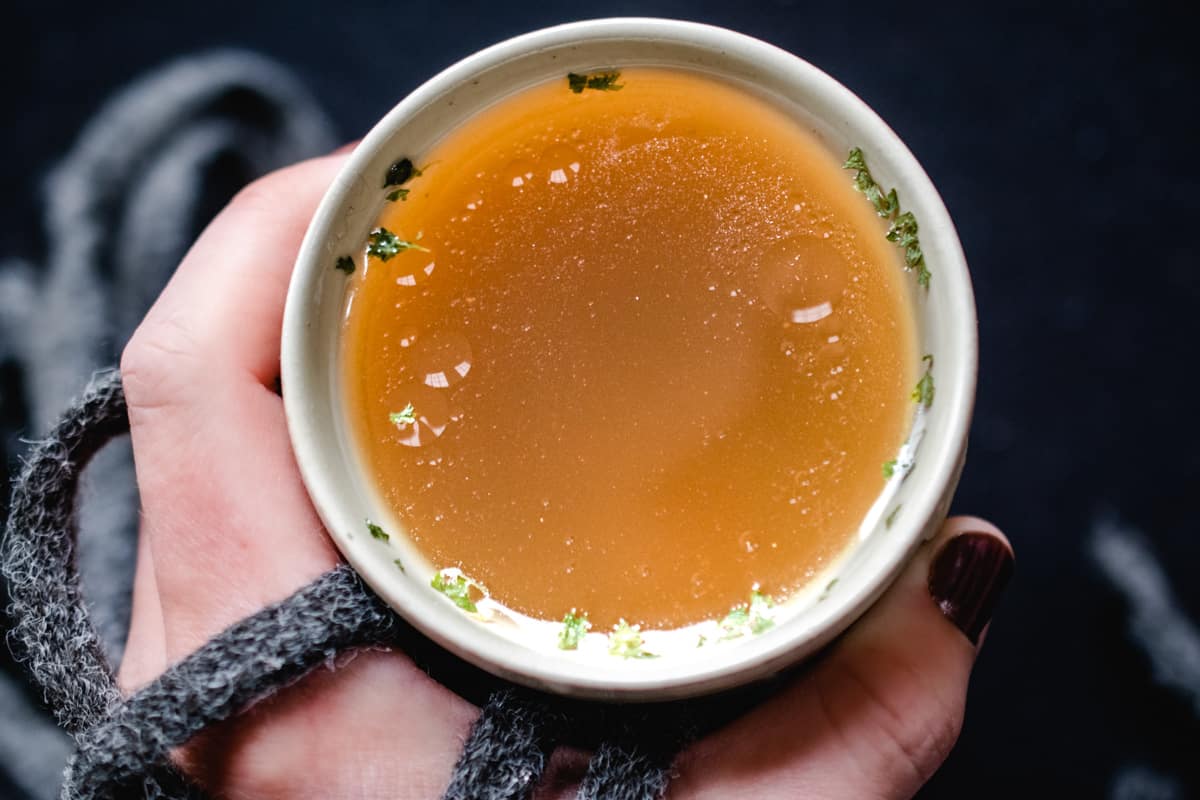
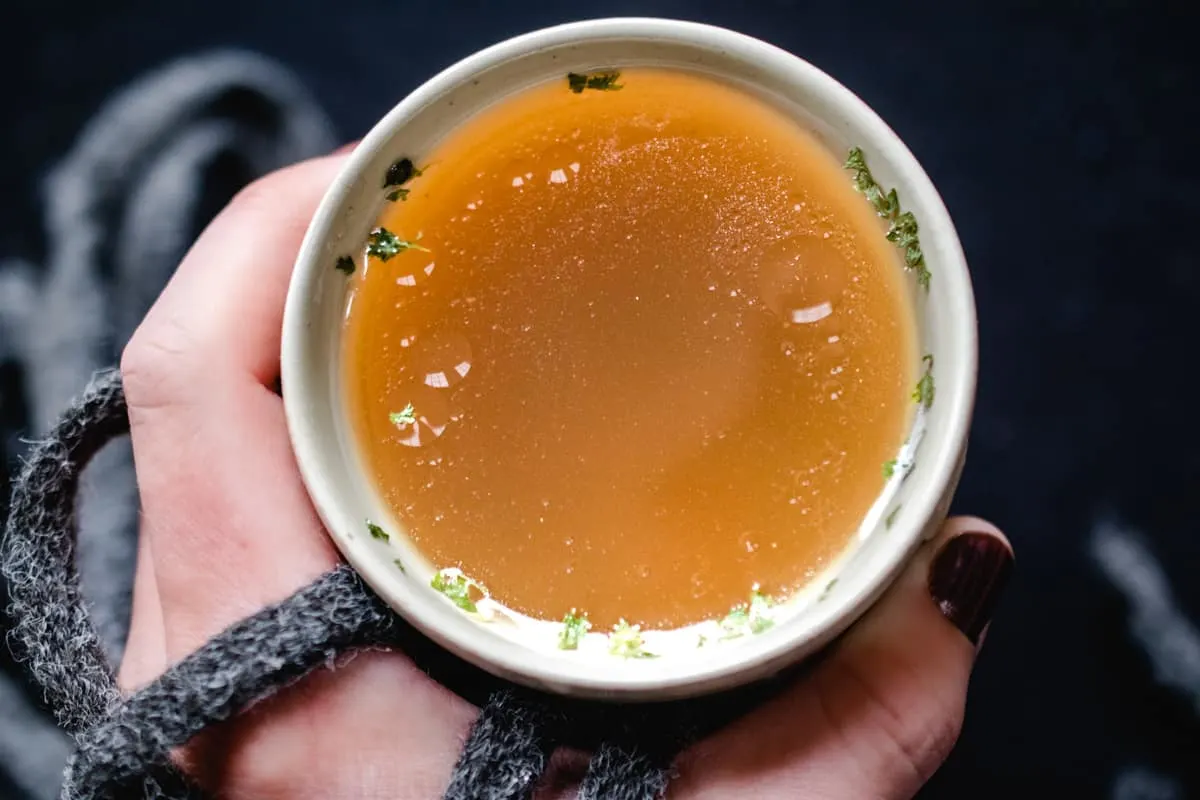
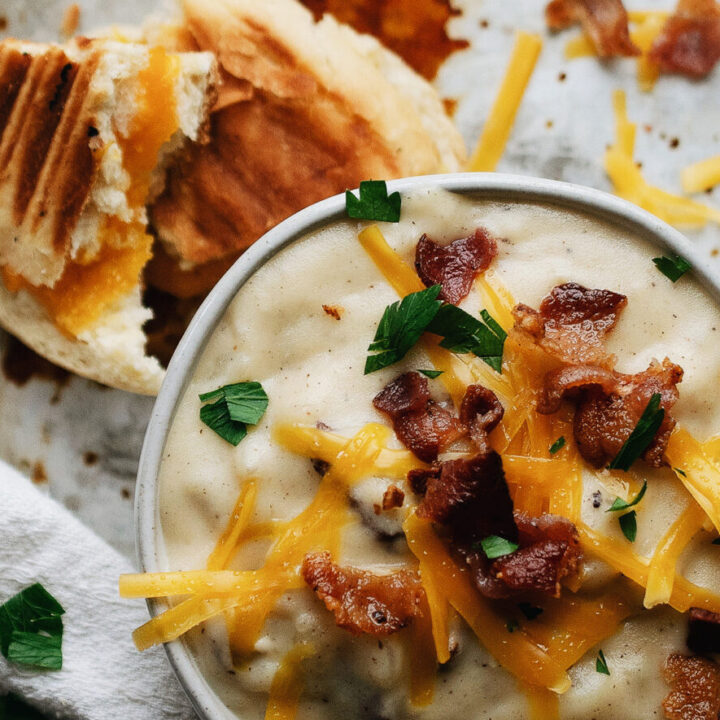
Drinking bone broth in a cozy mug is a great way to go about your day. It's simple, and delicious, and just makes you feel good.
However, you may want to dress it up once in awhile, especially if you plan to drink it often.
Here are some ideas for how to add things to your bone broth if you plan on drinking it:
- Make beef bone broth light and bright: add a squeeze of fresh lime, splash of coconut milk and pinch of coriander.
- Stir in a teaspoon of tomato paste and splash of cream into chicken bone broth for a tomato bisque-like experience.
- Toss in a pod or two of dried chili peppers to any bone broth to spice things up.
- Like egg drop soup? Whisk a beaten egg, minced mushrooms and minced water chestnuts into hot chicken bone broth. (The beaten egg will cook as it whisks into the hot broth.)
- Add minced garlic, freshly chopped herbs and a squeeze of fresh lemon to chicken bone broth.
- Give cold and flu season a one-two punch, and add fresh grated ginger, turmeric, and black pepper.
What are some health benefits of drinking and cooking with bone broth?
Bone broth is a powerful source of minerals and vitamins and can be an excellent addition to any healthy diet. It contains high levels of calcium, magnesium, phosphorus, sulfur, and sodium which are all essential for strong bones and teeth.
Additionally, it is packed with vital amino acids like glycine and proline that help build collagen in tendons, ligaments, organs and skin. This means bone broth can promote healthy joints as well as reduce wrinkles.
It also contains trace minerals such as zinc, iron and copper which can help boost the immune system and ward off illnesses that come from viruses or bacteria.
Lastly, drinking bone broth regularly has been known to improve gut health – it has anti-inflammatory properties that soothe the digestive tract and promote healthy digestion.
Is bone broth in the Instant Pot as good?
Bone broth made in the Instant Pot is just as good, if not better, than broth made on a stove.
Pressure cooking seals in moisture and flavor while still allowing the bones to break down and release their essential nutrients. Since it's so quick and easy, you can make bone broth in a fraction of the time compared to traditional methods.
Plus, it has a more intense flavor that some people prefer over regular bone broth. That said, both the Instant Pot and stovetop methods will yield delicious results.
Does pressure cooker destroy collagen?
No, the pressure-cooking process does not destroy collagen. In fact, it can actually help increase the amount of collagen in your bone broth due to the shorter cooking time and high heat.
Due to the higher temperatures and shorter cooking times that come with pressure cooking, proteins like collagen break down quicker and release more of their nutritional benefits than they would when cooked using traditional methods.
This means that dishes cooked using a pressure cooker will have more concentrated flavor and more nutritious components than those cooked on a stovetop.
Can you pressure cook bones for too long?
Yes, it is possible to pressure cook bones for too long. When cooking bones in a pressure cooker, the time taken can range from 10-90 minutes depending on the type of bone and the size of the pieces.
If the cooking time is too long, the collagen within the bones can break down completely, resulting in a weaker flavor profile and texture that isn’t as appealing.
Additionally, if cooked for too long, it’s possible for some vitamins and minerals to be destroyed due to overcooking. To prevent this from happening, it's always important to check your recipe and make sure you’re not exceeding the recommended cooking time.
Making your own gelatinous bone broth is an economical way to make sure you always have bone broth on hand for any recipes for future use, and for sipping! In my opinion, using the Instant pot is the best way to make it and is far superior to anything you can get at the grocery store.
If you tried this recipe, leave a comment below or rating using the stars in the recipe card.
Here are some related recipes.


📖 Recipe

Instant Pot Bone Broth
Equipment
- Pressure cooker
Ingredients
- 16-24 cups water ( 1-1.5 gallons)
- 4 lbs chicken or beef bones and parts fresh, frozen, or cooked
- vegetable scraps and ends optional
- salt and pepper optional
- bay leaves optional
Instructions
- Place the bones or chicken carcass in the pressure cooker.

- Top with add ins, if you have chosen to use them. (Vegetable scraps and ends like onion, garlic, carrots, or even fresh or dried herbs; optional.)
- Cover the bones with water. Use 16-24 cups (1-1 ½ gallons) depending on desired strength of bone broth. That's 16 cups (1 gallon) for stronger bone broth, or 24 cups (1 ½ gallons) for lighter bone broth.
- Seal the electric pressure cooker as directed and set on manual setting to high pressure for 2-3 hours time. 2 hours for lighter broth, 3 hours for stronger. Don't go over 3 hours, as that can be too long.
- Allow the pressure cooker to release steam naturally, carefully remove lid away from face and let cool.
- Pour the cooled broth through a fine mesh screen to strain out pieces. (Use either one large pot to divide the bone broth up later, or pour directly into storage jars.)

- Chill the strained stock in the fridge to allow fat to solidify and separate, then skim it off the top to remove from stock.


- Store in plastic bags in the freezer, or in the fridge in air tight containers.

Notes
- Store finished bone broth in the freezer for up to 6 months, or in the fridge for up to 4 days.
- Don't use pressure cooker to can stock; use a dedicated pressure canner.
- Additional herbs, seasonings and vegetable scraps are totally optional and just for flavor.
- Bones may be previously roasted (like from a rotisserie or roasted chicken), or raw, and even frozen.
Dominique
Thursday 1st of June 2023
After Ive frozen the broth once I put it back in the fridge to defrost will it turn back into a jelly like consistency? Or will it just be liquidy?
Jenna Johnson
Sunday 4th of December 2022
The advice about feeding the bones to your pets is horrible. No dog should consume or chew on cooked bones from chickens or any animal for that matter unless cooked to a completely powder/gel consistency. Bones break teeth and do no digest once cooked. Raw bones are great for dogs, even chicken bones, but be wary of the size of bone vs the size of the dog.
Erin
Monday 16th of November 2020
By far, the easiest way to make bone broth. Regular bone broth takes 1 to 2 DAYS to make- this is a quick and easy alternative. So easy!!!