

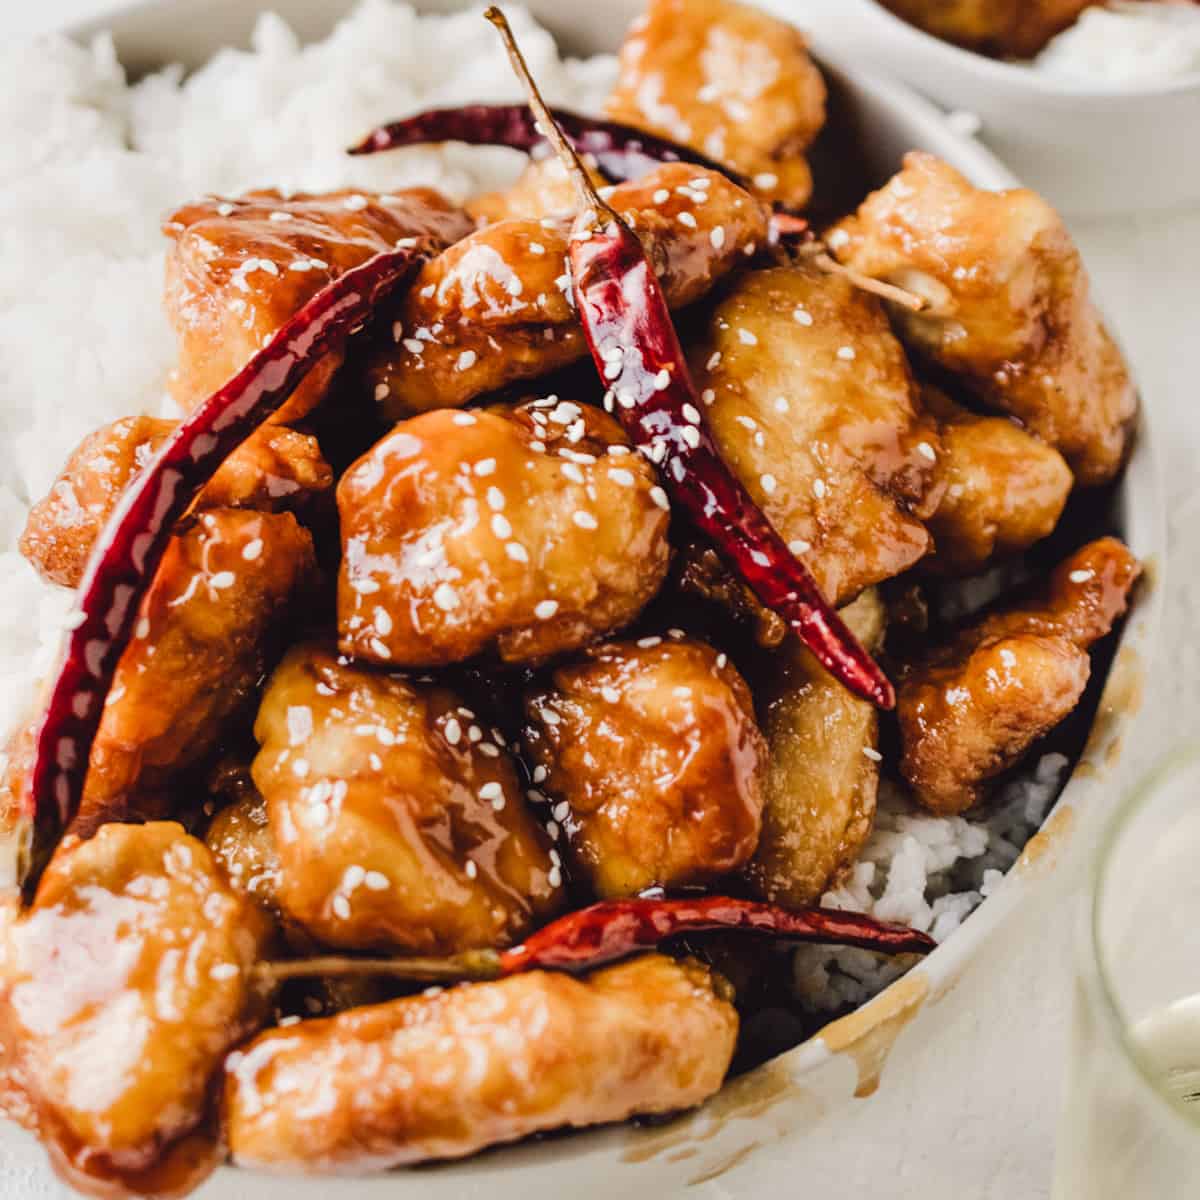
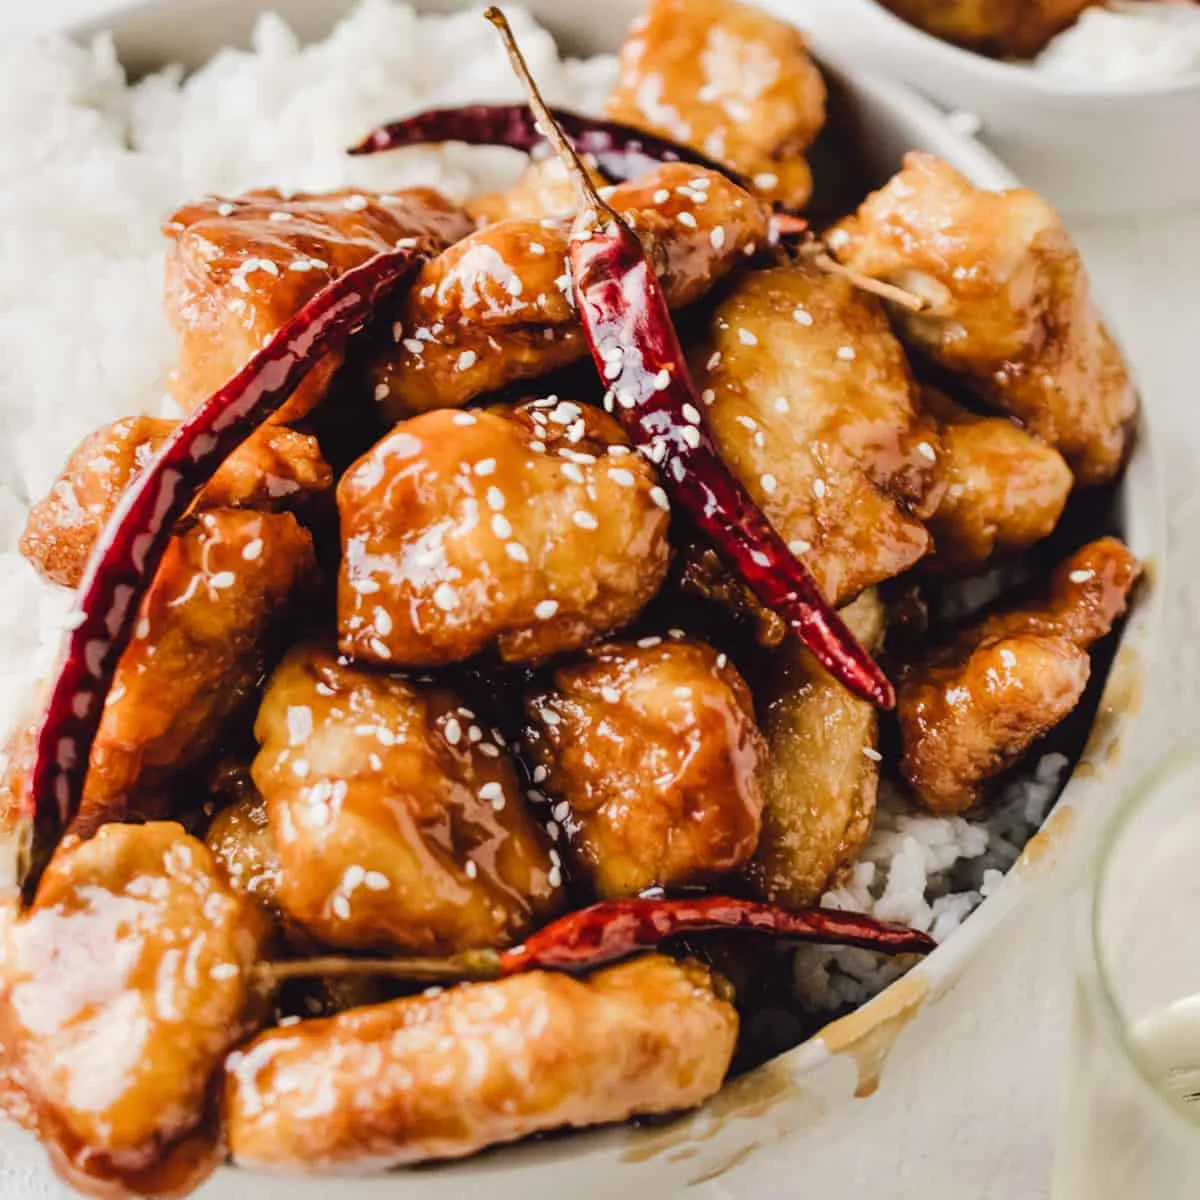
If you've tried making homemade General Tso's Chicken, but it always ends up soggy and nothing like Chinese takeout from your local Chinese restaurant, then try this Gluten Free General Tso Chicken that stays crispy to the last bite.
There are quick and easy steps you can take to ensure that you end up with homemade General's Tso chicken that is stays crispy and is just as tasty as takeout.
Why Make Homemade General Tso Chicken?
Crispy, crunchy, Gluten Free General Tso's Chicken doesn't have to be hard.
In fact, with this recipe, you can make your own Chinese food at home without the risk of cross-contamination and you know exactly what ingredients went into your food.
The flavors of this tangy sauce are even better than what you'd get at a restaurant and the whole family is going to love this.
You don't need any special ingredients. Everything we use in this recipe can be found in just about every kitchen.
Ingredients
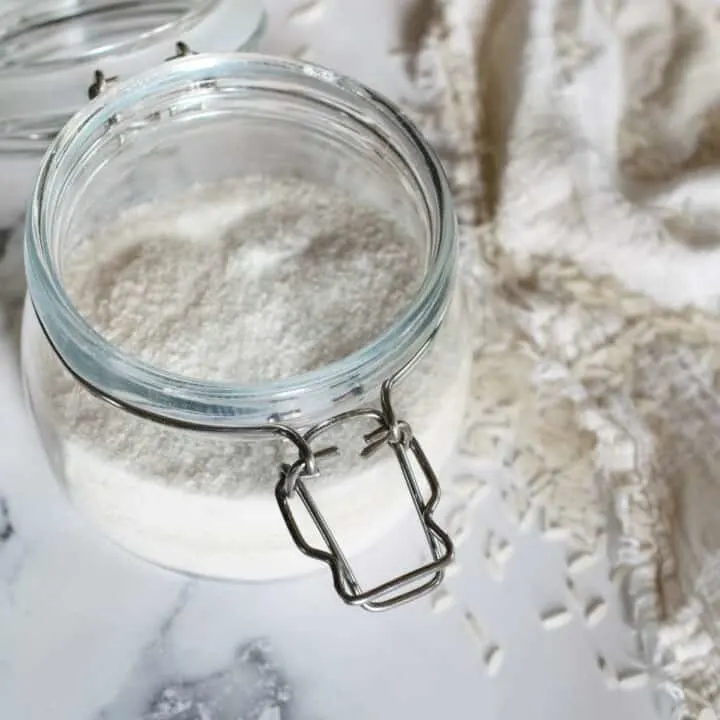
Flour- use a gluten free all-purpose flour or rice flour, which you can easily make at home.
Chili peppers- dried, red chili pods.
Chicken- white meat, chicken breast, cut into bite size pieces.
Soy sauce- make sure you're grabbing a gluten free soy sauce (or tamari) since this is a gluten free recipe. You can also use coconut aminos in place of traditional soy sauce.
Brown sugar- light brown, or dark is fine; can also substitute granulated sugar, honey, or maple syrup.
Rice vinegar- rice vinegar is preferred, but can substitute white vinegar.
Garlic- freshly minced, or dehydrated garlic powder.
Ginger- freshly peeled and grated, or dried ground ginger.
Green Onions- thinly sliced green onion (scallions) or dehydrated onion powder.
Corn starch- a naturally gluten free thickener.
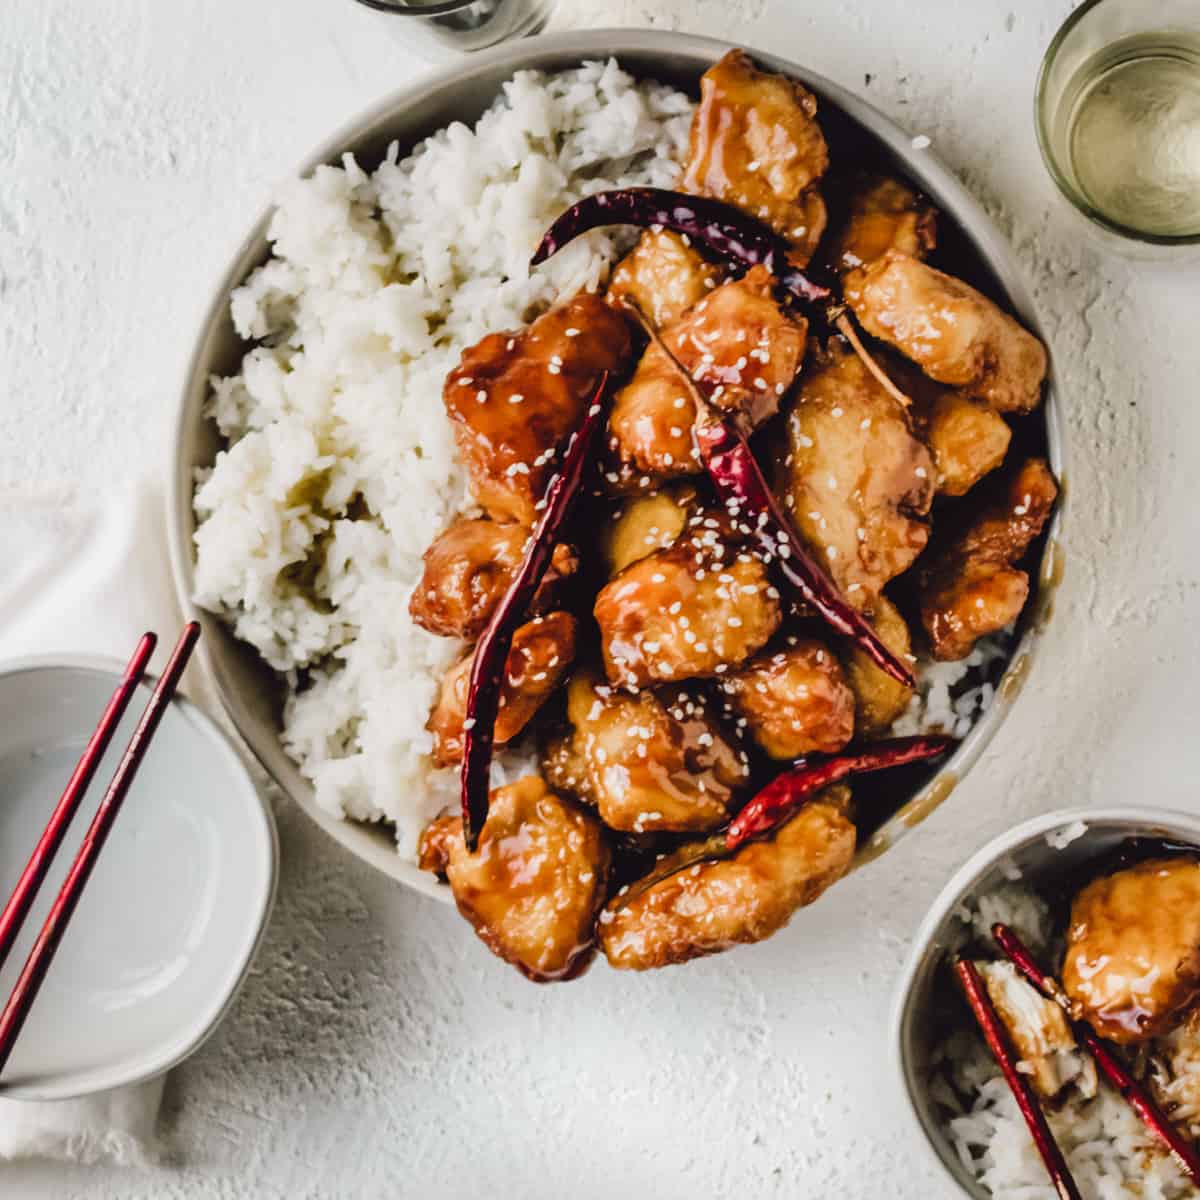
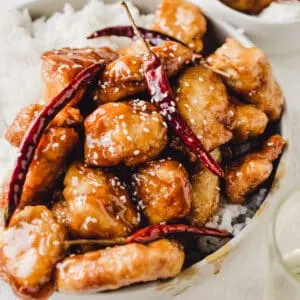
Sesame seeds- for finishing.
Vegetable oil- for frying.
Prepare
Cut the chicken into bite size pieces. Pat dry with paper towels.
Mince the garlic, grate the ginger and slice the green onion if not using powdered spices.
Whisk the soy sauce, sugar, rice vinegar, garlic, ginger and onion together in a small bowl with water and set aside.
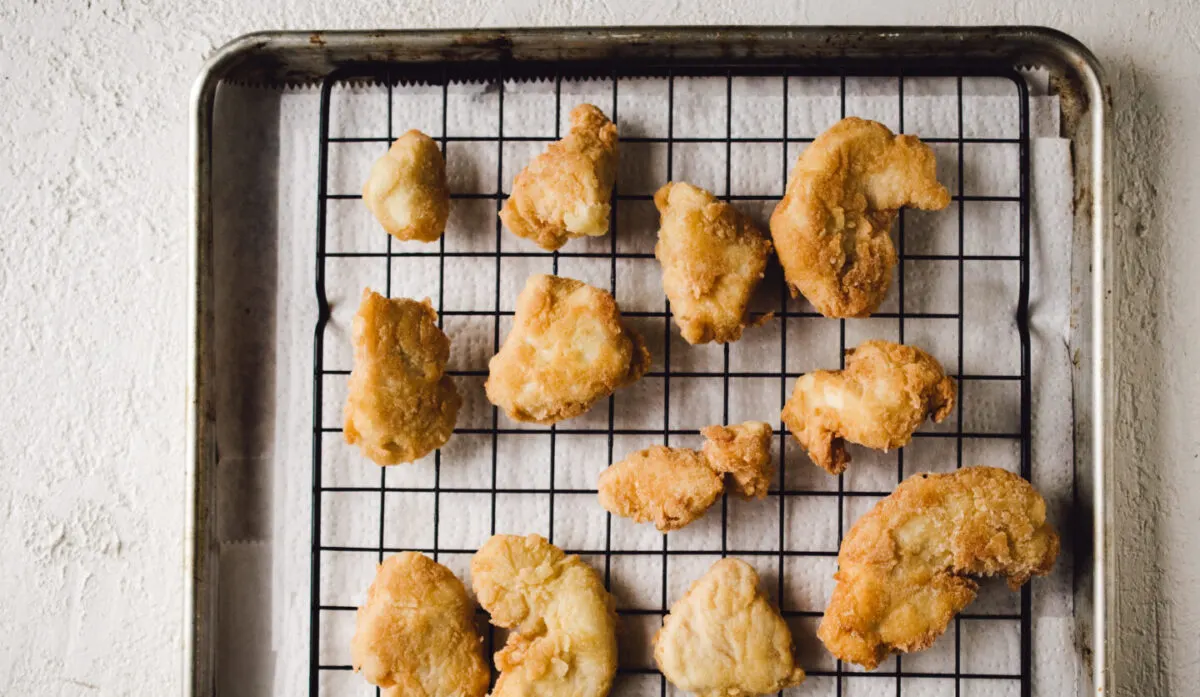
Prepare a draining station for the fried chicken pieces, consisting of a wire rack elevated over a baking sheet or paper towels to absorb excess oil.
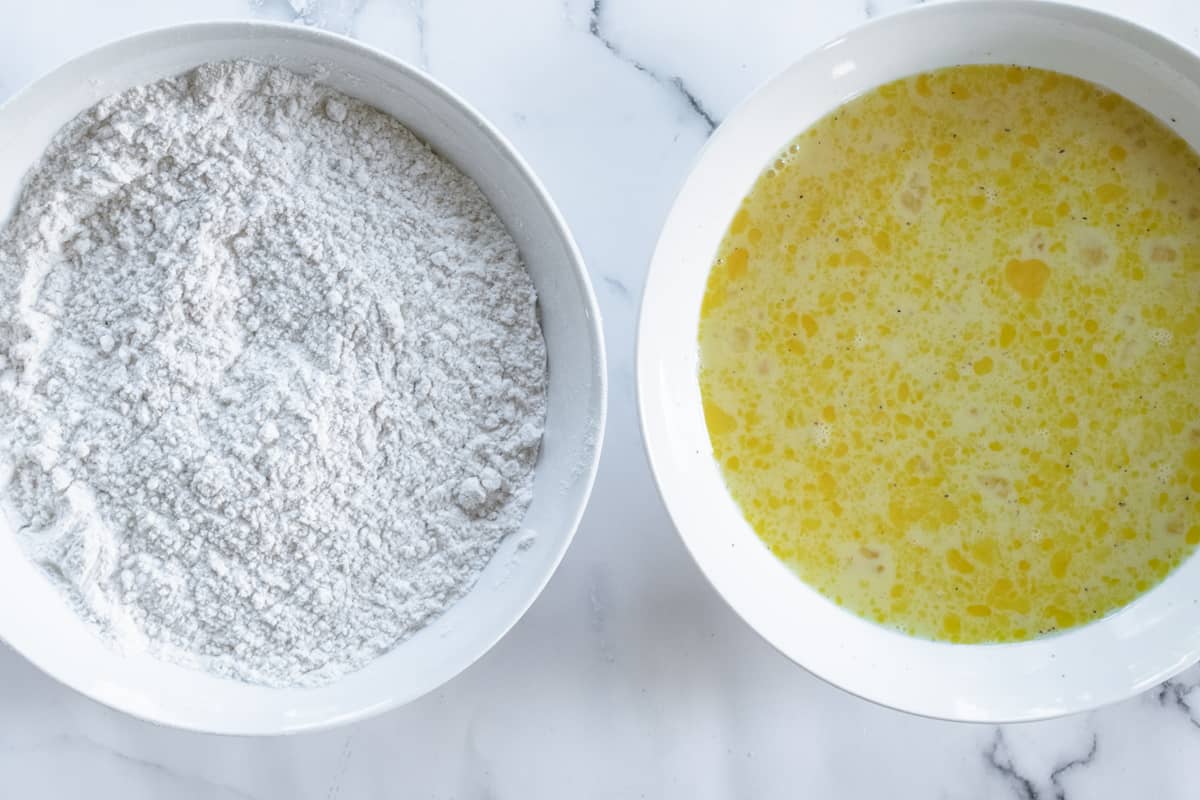
Dredging Station
The dredging and batter station should be done in a 3-part, double dredge fashion.
Dredge the chicken pieces in the gluten free flour or rice flour mixture, then dip them in the egg mixture, then back into the rice flour dredging mix again.
Do all of the pieces and set them on a plate.

Fry
Fill the oil just 1-2 inches deep.
Bring the oil to a temperature of 350 degrees F.
Place pieces of dredged chicken in the hot oil, leaving space between and cook for 1-2 minutes per side, flipping once they are golden and crisp.
Use tongs to transfer the fried chicken pieces onto the draining rack.
Repeat with remaining chicken pieces.
Transfer the fried chicken pieces out of the hot oil and onto the wire rack draining station until all the pieces are done, like shown below.

Sauce
When all of the chicken pieces are fried a golden brown, discard of the hot oil and wipe the skillet with a few paper towels to remove most of the leftover oil.
Whisk the soy sauce mixture again and pour into the skillet. Simmer on medium heat for a couple of minutes until thickened.
Add the breaded, fried chicken pieces and dried chili pods and toss to coat in the most delicious General Tso sauce.
Serve immediately with steamed or fried rice, or desired side.

Storage
The best way to store leftover chicken and spicy sauce is stored in an airtight container and should be kept in the fridge. They'll last up to 3 days.
Keep in mind that the crispy chicken may lose its crispness once stored with the sauce over time.
I wouldn't recommend freezing this as the texture of both the fried chicken and the sauce may change when thawed and reheated.
Is General Tso's Chicken spicy?
This recipe has a little heat to it from the sauce ingredients, but it also has a little sweetness to it, to help balance the flavors a bit. You can adjust the heat level of your dish very easily the next time you make it.
If you like less heat, just use less chili peppers. If you really enjoy the eat, toss in more and add some red pepper flakes to the mix.
Or you can make the sauce ahead of time and add the chili pods directly to the sauce so they soak in it for up to 30 minutes (or longer for even more heat).
Can I use chicken thighs instead of chicken breast?
I don't see why not. Just know that this recipe was tested with chicken breast, which is white meat.
If you go with chicken thighs, that's dark meat and could be a little greasier than the chicken breast version. The flavor would still be delicious.
What should I serve General Tao's Chicken with?
Serve it with a side of your favorite rice, chicken fried rice, sweet and sour chicken, orange chicken, cauliflower rice, brown rice, plain white rice, etc.
You could also add a side of broccoli or thinly sliced carrots to go with it.
How do I prevent the chicken from getting soggy?
Once you've fried the chicken, put it on a wire cooling rack that is sitting on a baking sheet with paper towels to catch any drips.
Plus, keeping the chicken elevated from the paper towels so any steam that is released can escape and not let the chicken get soggy.
General Tso's Chicken Recipe Tips
- If you don't need this to be a gluten free recipe, you can use all purpose flour in place of the gluten free flour and use regular soy sauce instead of tamari, or gluten-free soy sauce.
- You can make this healthier by sautéing your lighter general tso's chicken in a frying pan or air frying the chicken pieces to get a nice crispy exterior without all the extra deep fried calories.
- When frying the Gluten-Free General Tso's Chicken, don't overcrowd it in the pan, space the chicken out in an even single layer, or it may not cook evenly.
Check out these other related gluten free and take-out style recipes, or scroll down to the recipe.


If you tried this recipe, leave a comment below or a rating in the recipe card.
📖 Recipe

Gluten Free General Tso Chicken
Ingredients
- 2 pounds chicken breast 1-2 inch pieces
- vegetable oil for frying
For the Dredge
- 1 cup all purpose flour can substitute gluten free all purpose flour
- 1 cup rice flour
- ½ teaspoons garlic powder
- 1 teaspoon ginger ground
- ½ teaspoon granulated sugar
- ½ teaspoon salt more or less to taste
- pepper to taste, optional
For the Egg Wash
- 6 large eggs
- 1 tablespoon soy sauce
- salt and pepper to taste optional
For the Sauce
- ½ cup soy sauce
- ¼ cup granulated sugar
- 1 teaspoon ginger ground
- 1 teaspoon garlic powder or minced garlic
- ½ teaspoon onion powder
- 1 tablespoon corn starch can substitute 2 tablespoons of all purpose flour
- 1 tablespoon rice wine vinegar
- ½ cup water
- 6-8 dried chili pepper pods
For Serving
- sesame seeds for garnish
- steamed white rice for serving
Instructions
Prepare the Sauce
- Mix together all sauce ingredients, leaving out the chili pods for now for a milder flavor. If spicier sauce is desired, add chili pods to the sauce to soak while the rest of the recipe is prepared (you can also do this a few days in advance for even more kick).
Prepare the Chicken and Frying Oil
- Cut thawed chicken into bite size pieces, pat dry. Salt and pepper to taste (optional).
- Combine the dredging ingredients in one medium sized bowl and egg wash ingredients in another bowl of the same size.
- Working with one piece of chicken at a time, dredge each chicken piece first in the flour mixture, then dip in the egg, then back in the flour mixture again to coat; set aside on a plate. Repeat with each chicken piece.
- In a large, heavy skillet, heat 1-2 inches deep of oil to medium-high heat, or 350 degrees Fahrenheit with a thermometer. If the oil is smoking, it's too hot.
- Once the oil has come to temperature, begin frying the prepared chicken pieces, working in batches. Set the pieces in the hot oil, with some room between each of them. Fry on that side until golden brown, about 2-3 minutes. Turn, and repeat for other side. Set finished pieces onto a wire rack over a paper towel lined baking sheet, making sure the chicken pieces are elevated at least half an inch over the paper towels. Don't crowd the chicken stack it, which will steam it and make it soggy. Repeat batches until all the chicken is fried. REMOVE OIL FROM HEAT-DRAIN IMMEDIATELY OR PLACE IN A SAFE PLACE TO COOL WHERE IT CAN'T BE PULLED DOWN BY CHILDREN-OIL STAYS HOT AND DANGEROUS FOR AT LEAST ONE HOUR AFTER BEING REMOVED FROM HEAT.
- Heat a shallow, dry skillet (preferably a cast iron skillet, if possible) on medium to medium-high heat.
- Give sauce a quick whisk to combine any ingredients that have settled, and pour into the hot skillet, along with the dried chili pods if they haven't been added to the sauce yet; simmer for 2 minutes until sauce begins to thicken. (If you substituted flour for corn starch, simmer for 4 minutes.)
- Add fried chicken pieces to thickened sauce, and toss to coat. Remove skillet from heat.
- Sprinkle chicken with sesame seeds in the skillet.
- Serve with steamed white, brown, or cauliflower rice and sesame seeds.
Notes
- For a gluten free version of this dish, substitute all purpose flour with gluten free all purpose flour. Prepare the rest of the dish as normal.
- Elevate fried chicken pieces on a cooling rack at least ½ an inch over paper towels or any surface to allow steam to escape (so they don't become soggy).
- Don't crowd the chicken while frying, or draining.
- Sauce can be made in advance and stored in refrigerator for up to one week.
- For a spicier sauce, make the sauce in advance and add chili pods directly to the sauce to soak. They can soak from 30 minutes for a mild kick, or longer for a spicier kick. The longer they soak, the spicier the sauce will be.
- For a mild sauce, only add the chili pods to the sauce with the chicken, and toss to coat. Don't serve chili pods to anyone who desires a mild flavor.
KfnqDuxw
Wednesday 8th of April 2026
1-1)) OR 623=(SELECT 623 FROM PG_SLEEP(15))--
KfnqDuxw
Wednesday 8th of April 2026
1*if(now()=sysdate(),sleep(15),0)
if(now()=sysdate(),sleep(15),0)
Wednesday 8th of April 2026
1
KfnqDuxw
Wednesday 8th of April 2026
1
MmzHrrdb
Tuesday 11th of November 2025
1'||DBMS_PIPE.RECEIVE_MESSAGE(CHR(98)||CHR(98)||CHR(98),15)||'
KfnqDuxw
Wednesday 8th of April 2026
1'||DBMS_PIPE.RECEIVE_MESSAGE(CHR(98)||CHR(98)||CHR(98),15)||'
KfnqDuxw
Wednesday 8th of April 2026
1-1); waitfor delay '0:0:15' --
KfnqDuxw
Wednesday 8th of April 2026
1-1; waitfor delay '0:0:15' --
KfnqDuxwnZfUfwv2') OR 102=(SELECT 102 FROM PG_SLEEP(15))--
Wednesday 8th of April 2026
1
(select(0)from(select(sleep(15)))v)/*'+(select(0)from(select(sleep(15)))v)+'"+(select(0)from(select(sleep(15)))v)+"*/
Wednesday 8th of April 2026
1