Make your own ham and cheese hot pockets with a buttery white or healthy wheat-option crust, and all the gooey cheese filling with thin-sliced ham. Homemade hot pockets are healthier than the store bought ones, are cheaper to make and are even more delicious than others that you've had.


Homemade hot pockets are also quick and easy to make with store-bought dough or from scratch. The possibilities are endless, giving you control over what goes into your hot pockets and how you make them.
You can add extra cheese, choose different types of meats, or even give it a kick by adding some spices. Homemade hot pockets can be prepped ahead of time and frozen for when you need something fast and delicious for lunch or dinner.
Why this recipe works
This hot pockets recipe is so easy to make, there's no reason to buy the boxed version.
You can make these warm pockets of portable joy with real ingredients, and for a fraction of the cost.
The recipe for the homemade pizza dough crust is an adjustment to this Whole Wheat Pizza Crust recipe. However, you can stick to the tender, flaky white flour crust if you prefer.
The small amount of yeast used in the hot pocket dough is perfect: it's just enough to get the job done, resulting in a chewy thin crust that isn't overly puffy.
Either hot pocket dough recipe will yield a delicious crust, but I tend to prefer the wheat crust version.
They're freezer-friendly too. Just like the frozen boxed brand, these can be made ahead and stored in the freezer for months. To heat, microwave on high for 1 ½ to 2 minutes, or bake at 350°F (177°C) for 15-18 minutes.
Ingredients
Get all the info on these simple ingredients in the ingredient list in the recipe card at the bottom of the post.

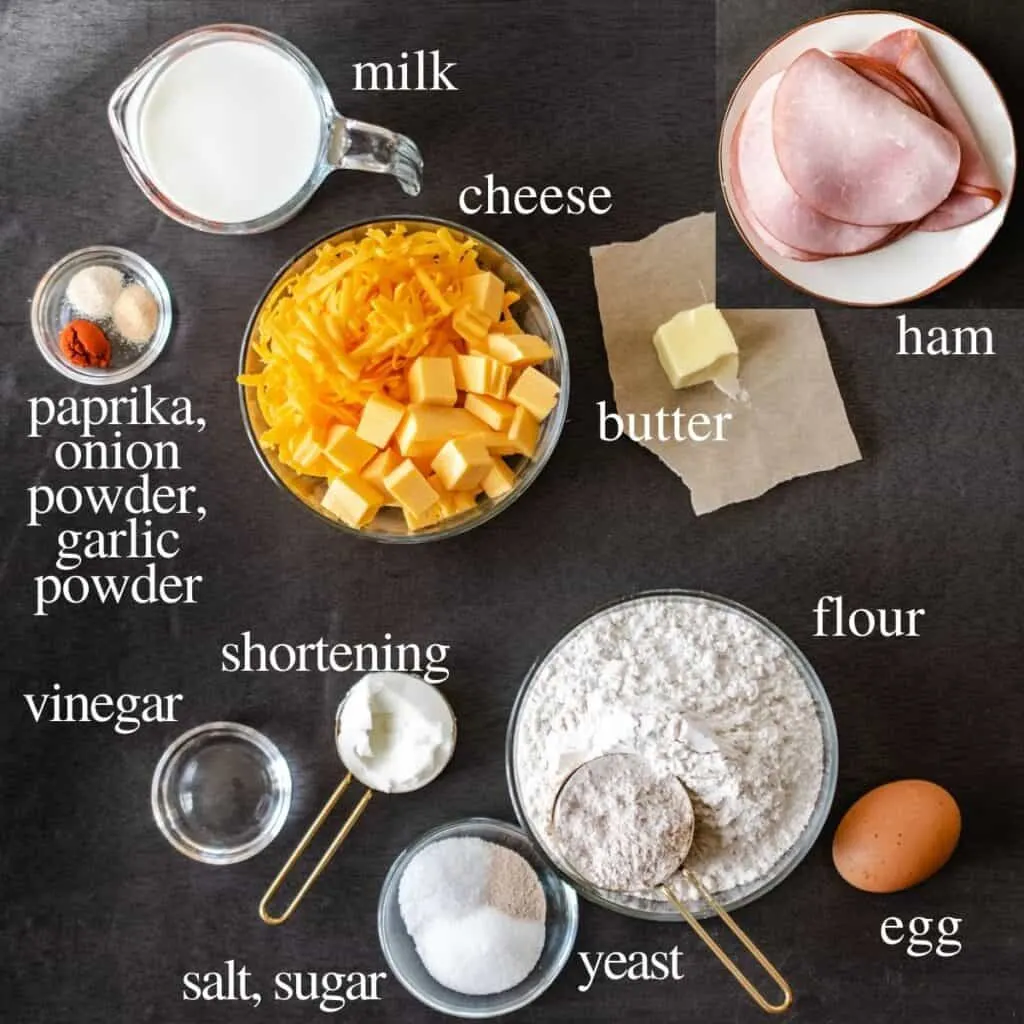
Ham- Smoked ham from your deli sliced thin (you can even ask them to slice it for you!)
Cheese- a blend of medium or sharp cheddar, or both, along with a small amount of American cheese makes for a creamy sauce like consistency. Use cheese on the block, and shred by hand; don't use pre shredded cheese.
Flour- all purpose, bread flour are both fine, and you can substitute a portion of whole wheat flour as well, if desired.
Yeast- use instant or bread machine yeast as it doesn't require being activated. See recipe notes for using active dry yeast.
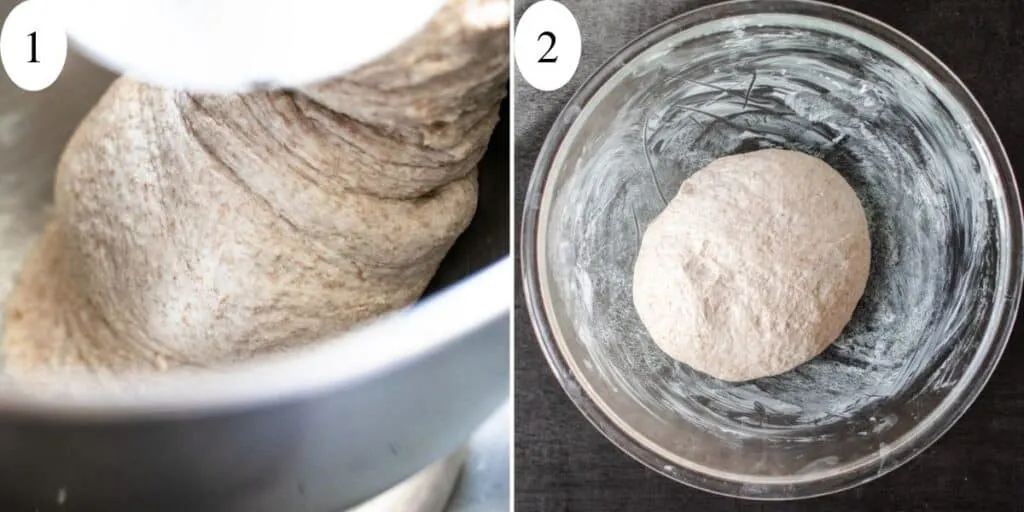
Making the dough for the crust
As I mentioned above, this recipe calls for a portion of whole wheat flour, but you can use all white in the same quantity, and follow the recipe the same.
Using whole wheat makes it a healthy hot pocket alternative, but I do think the sweet, nutty flavor of the crust goes better with the rich cheese sauce and salty ham.
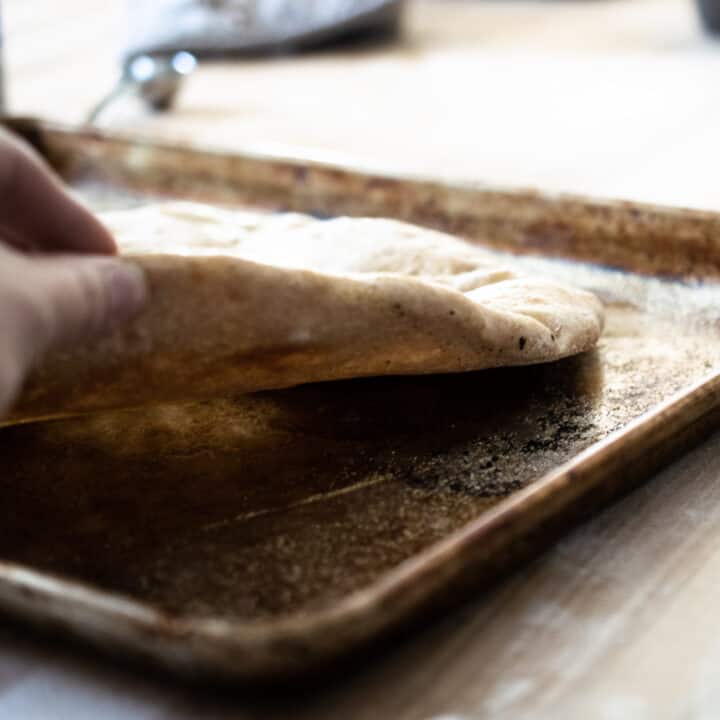
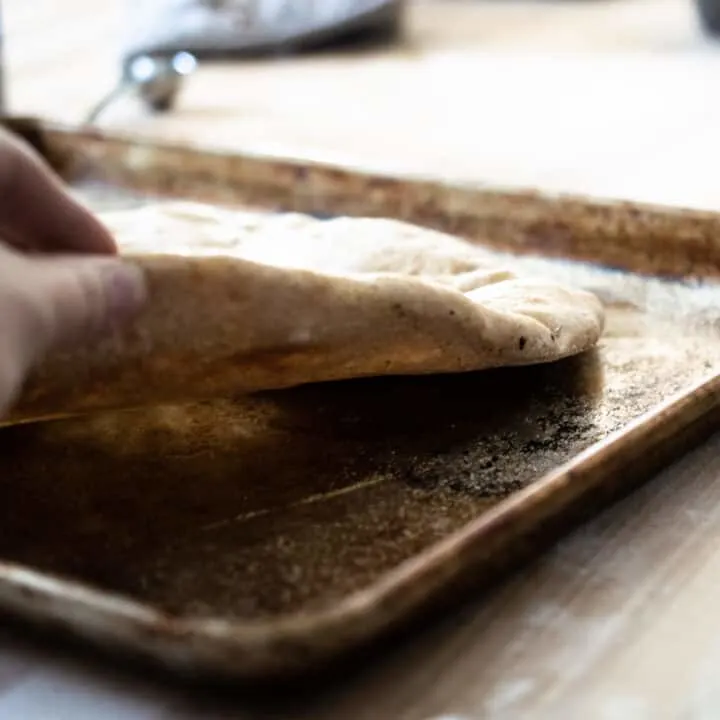
Start by combining the dough ingredients in the bowl of a stand mixer using the dough hook on the lowest speed. Continue to run the mixer for 5 minutes until dough begins to pull away from the edges as shown below (photo 1). Then, transfer the ball of dough to a greased bowl and rotate it a few times to coat in the shortening or butter (photo 2). Cover, and allow to rest in a warm location for 1 hour (or in the fridge overnight).

Make the filling
While the dough is resting/rising make the ham and cheese sauce filling.
In a medium sauce pan, on medium high heat, melt the butter and add the flour (photo 3). Whisk this until smooth to create a roux, which will thicken the cheese sauce. Add the spices, and whisk until blended (photo 4), sautéing for a minute to lightly toast.
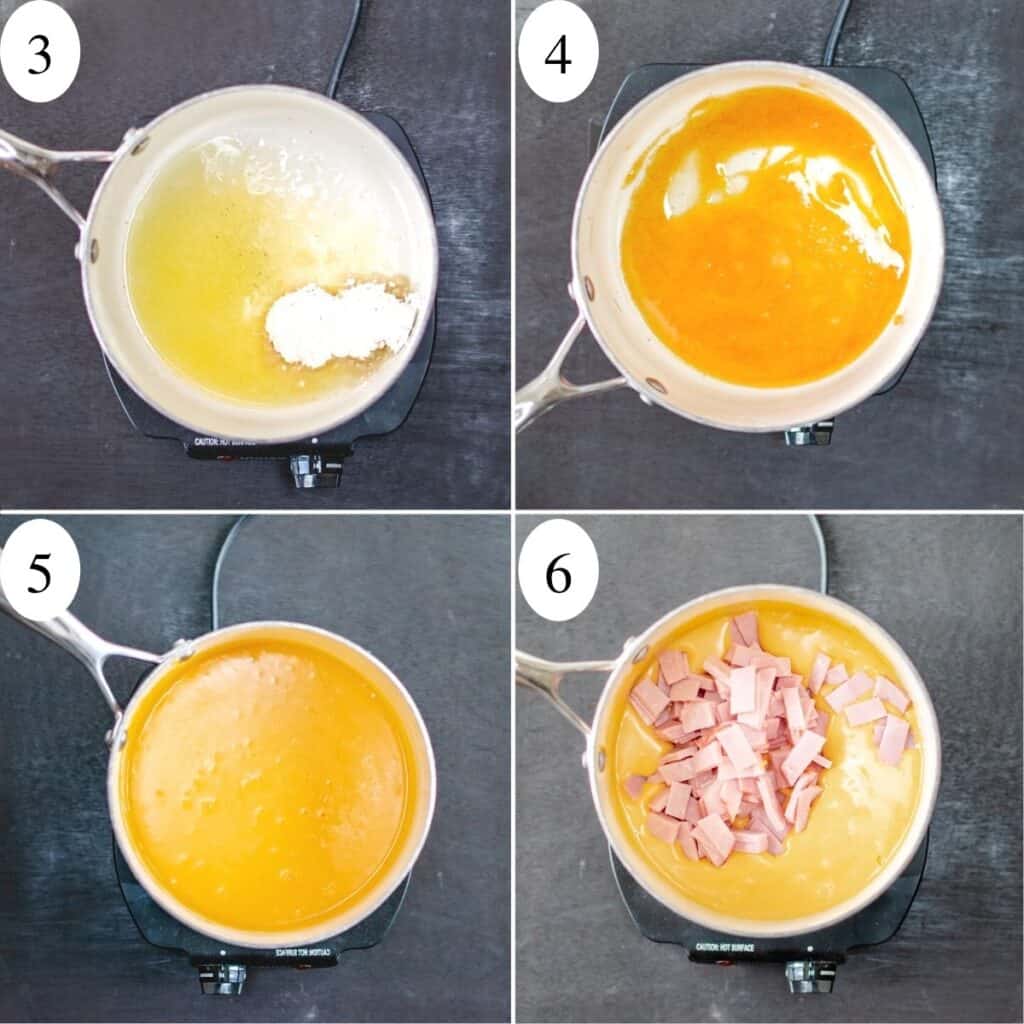

Reduce the heat to medium, and add the shredded cheese, cream cheese and water (to aid in melting) to the pot, and allow to melt, stirring occasionally for about 5 minutes until completely smooth (above, photo 5).
Add sliced ham pieces (photo 6, above). Stir to combine, and remove from heat. Ham and cheese filling should be thick.
Cut the dough
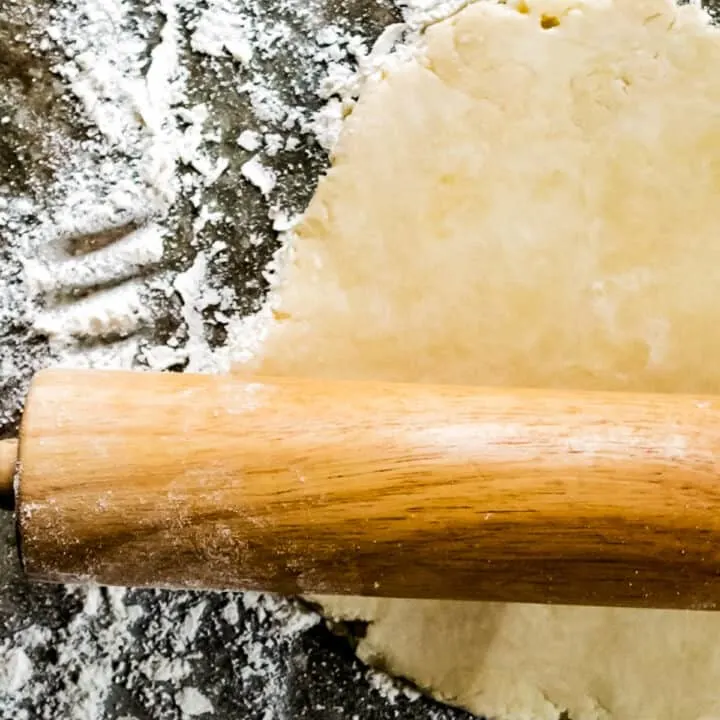
On a floured surface, use your finger tips to press the dough flat. Roll the dough out into ⅛ inch thickness.
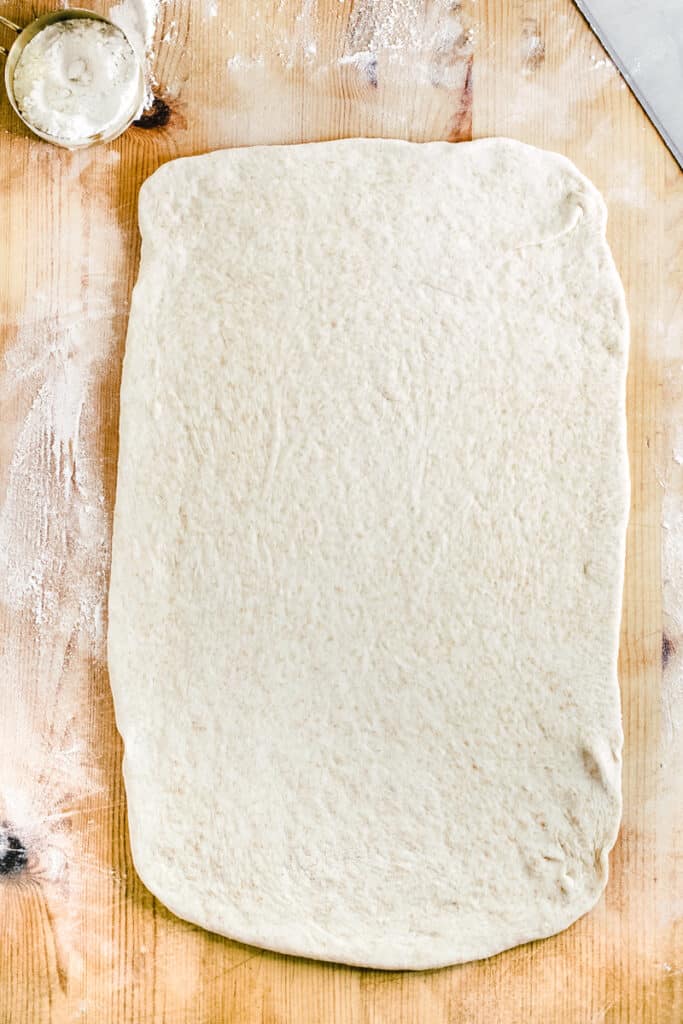
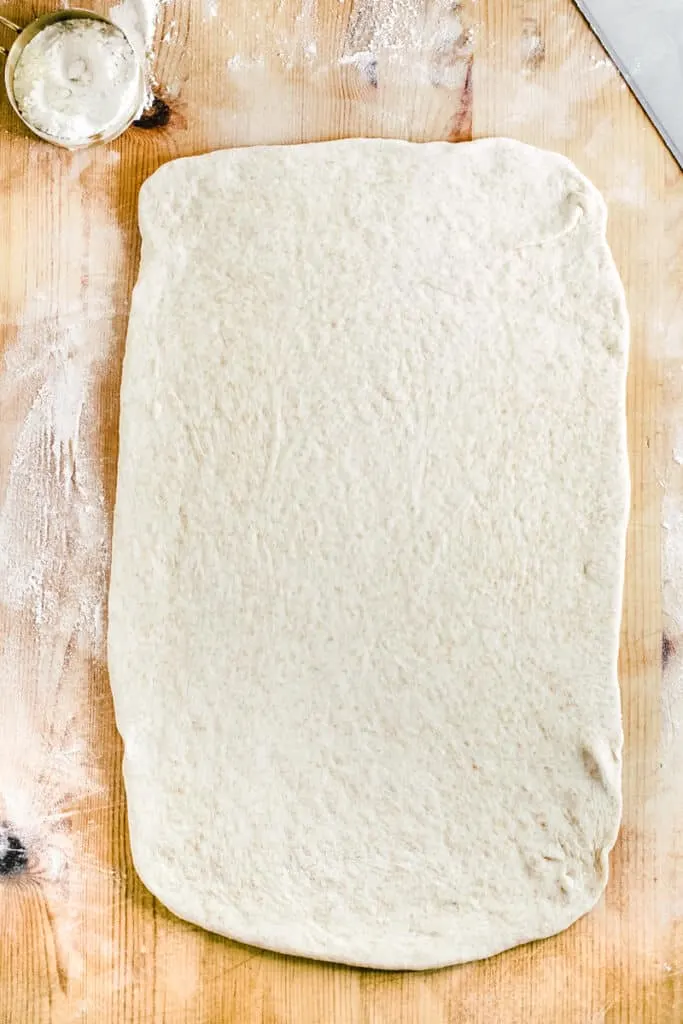
Use a pizza wheel, pasta cutter or just a sharp knife to cut 2-inch by 4-inch rectangles. You can collect the scraps together and repeat with remaining dough until it has all been cut.
Fill the pockets
Transfer rectangles onto a parchment lined or non stick baking sheet, leaving an inch of room in between. You'll likely need two baking sheets, or to work in batches.
Spoon 3-4 tablespoons of filling onto each rectangle and spread lengthwise, leaving about ½-inch space. Filling will be thick if it's cooled down a lot. Repeat until all rectangles are topped with filling.

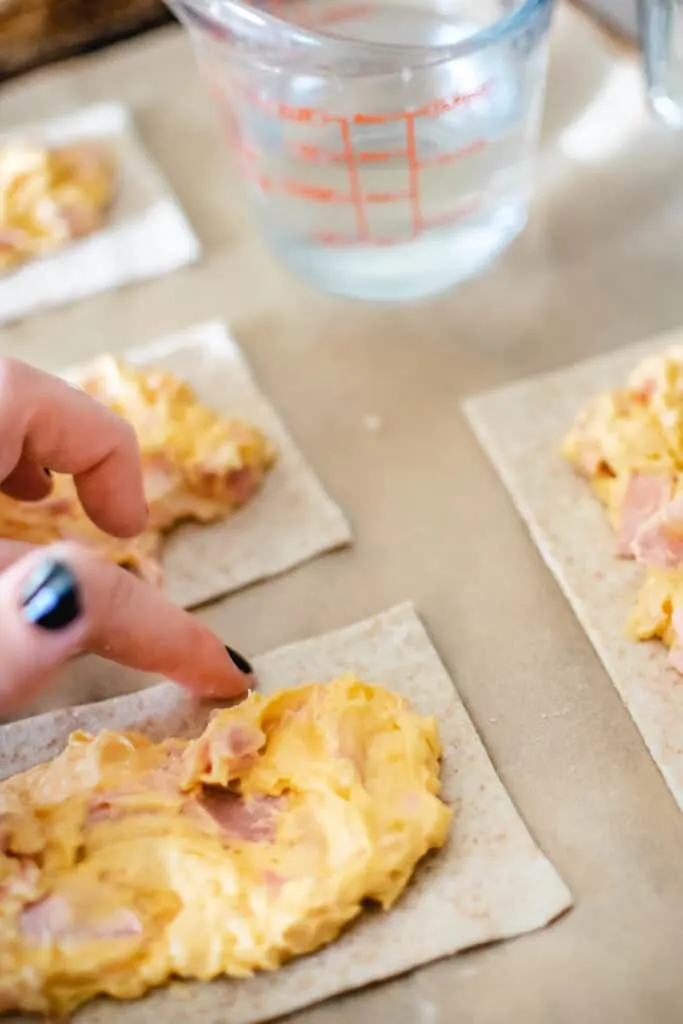
Once the filling is spread on, dip your finger in a cup of water, and run over the edges all the way around. This will help create a seal when the top dough is placed on.
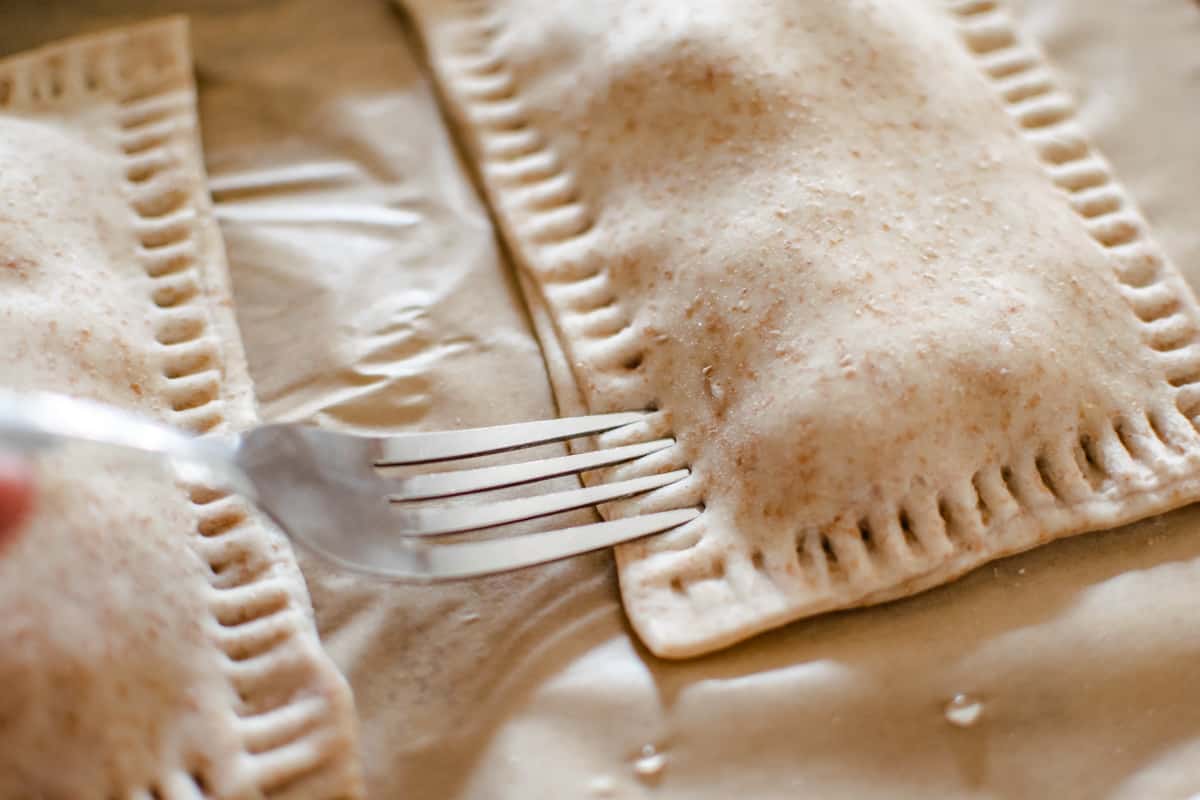
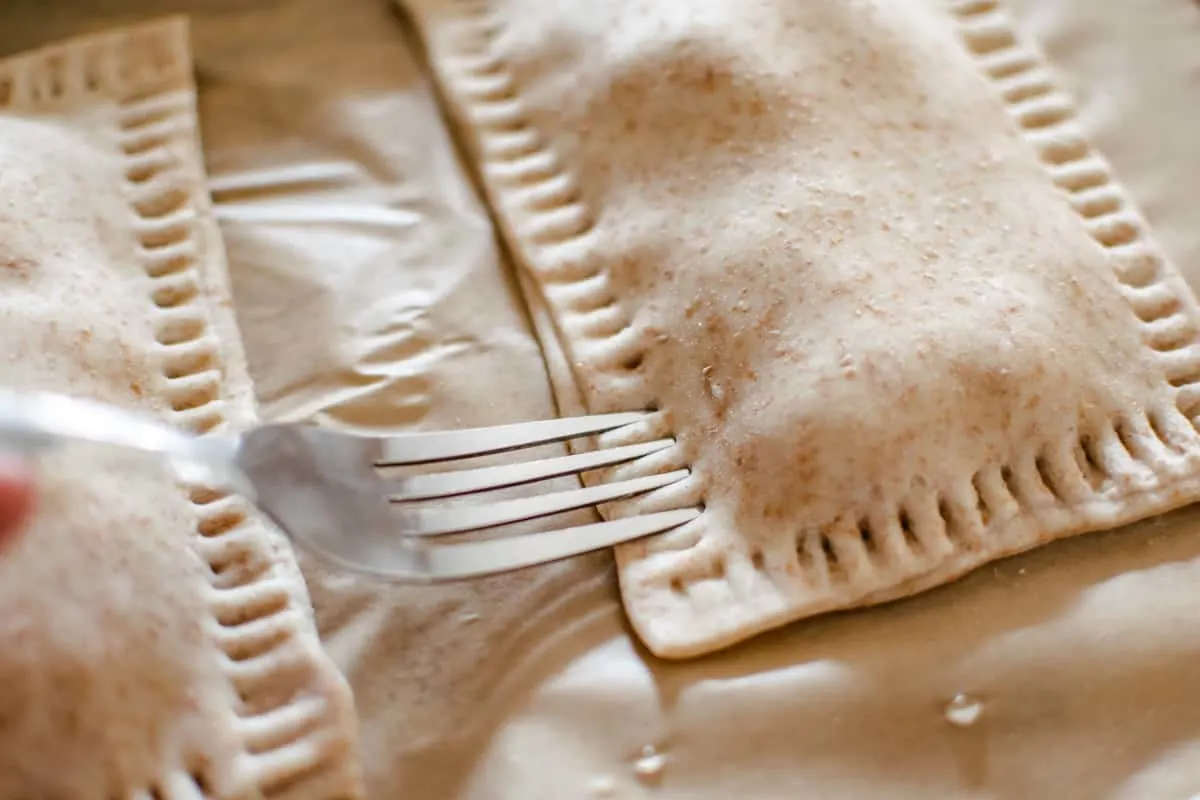
Place a top rectangle over the filling, matching up the edges. Press around the perimeter of each pocket with the tines of a fork to further seal them.
Create vents for steam
For a shiny, golden crust that is more attractive looking, brush the pockets with beaten egg before baking. An egg wash is simple to make, just pop an egg in a small bowl and whisk until frothy then use a pastry brush to brush on the top of the dough.
Before baking, cut slits using a sharp butcher knife, or poke holes using the tines of a fork to allow steam to escape.

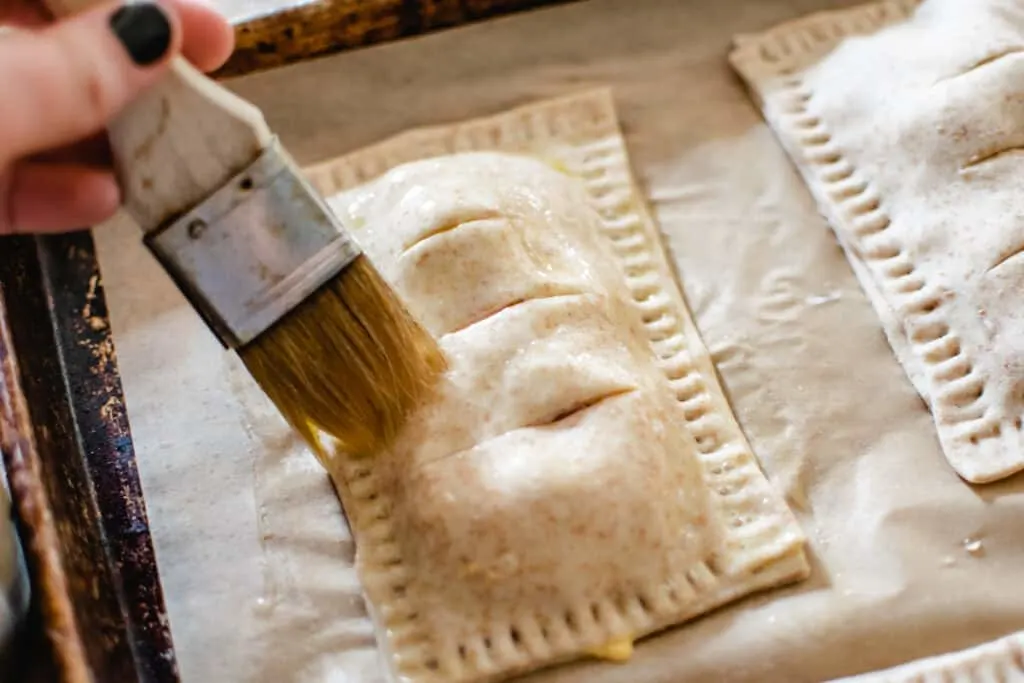
If they close up, the filling might burst out the sides, so keep an eye on them, especially if you've brushed them with egg wash.
Bake the pockets
Bake the ham and cheese pockets in a 350°F (180°C) for 20-26 minutes until edges are golden brown and bottoms appear cooked when lifted with a spatula.
Check the ham and cheese hot pockets 10 minutes into cooking time to see if they need to be re-pierced.
Allow ham and cheese hot pockets to cool for at least 10 minutes before eating, and be careful because they will be hot!
Recipe notes
- When baking, the steam vents are very important. Check them 10 minutes into the cooking time to see if they need to be re-pierced, as sometimes they can close up (especially when using egg wash).
- Do not substitute the water in the cheese sauce with milk (the addition of water in the cheese sauce is to aid in melting, and most of it evaporates), because the milk won't evaporate. You'd end up with exploded hot pockets, as the filling will bubble too much inside the crusts as they bake.
- For freezer friendly ham and cheese hot pockets, follow the recipe as is and bake 5 minutes short of regular baking time. Then flash freeze your hot pockets for later. Once frozen, place frozen hot pockets in a freezer safe container or freezer safe bag for up to 3 months.
- To reheat ham and cheese pockets from frozen, cook on high power in the microwave for 3 minutes on 50% power (or 1 ½ minutes on high power); or bake in the oven for 25 minutes at 350°F, or until heated throughout.


Storage
Homemade ham and cheese hot pockets can be stored in the refrigerator for up to 4 days. Store them in an airtight container or wrap them tightly with plastic wrap or aluminum foil.
To freeze, place the hot pockets in a freezer safe bag and store for up to 3 months. When ready to eat your hand pies, reheat according to the instructions above.
What other hot pocket filling can I use?
Another common homemade hot pocket filling would be a pizza filling to create a pizza pocket. For this, you can use your favorite marinara sauce or pizza sauce. You can add some finely shredded mozzarella cheese and maybe a few small, diced up pepperoni, mushroom or green peppers for the inside.
Use your favorite pizza toppings in small amounts and diced up or crumbled up finely. These are great ideas to fill your homemade hot pockets recipe with.
You could make breakfast homemade pizza pockets by making an egg and crumbled sausage with cheese mixture to go inside as well. The options are endless. Feel free to use your creativity to experiment until you find your favorite combination.
If you make a double or even triple batch of your homemade dough or get enough pre-made dough, you can easily make a bunch of different kinds of homemade hot pockets to have on hand that will please even the picky eaters in your family.
Making your own homemade version is insanely easy when using this simple recipe. Feel free to share with us your favorite combination in the comments below.
Related recipes...


If you tried these homemade Ham and Cheese Hot Pockets, give a rating below!
📖 Recipe


Ham and Cheese Hot Pockets
Ingredients
For the Crust
- 1 ½ cups all purpose flour
- 1 cup whole wheat flour
- 1 teaspoon salt
- 1 tablespoon sugar
- 1 teaspoon instant yeast
- 2 tablespoon shortening
- ½ teaspoon white vinegar
- 1 cup lukewarm water
For the Ham and Cheese Filling
- 2 tablespoon butter
- 2 tablespoon all purpose flour
- 2 cups shredded mild cheddar cheese off the block
- 2 oz cream cheese
- ¼ cup milk or water
- ⅛ teaspoon paprika NOT SMOKED PAPRIKA
- ⅛ teaspoon garlic powder optional, for zestier flavor
- ⅛ teaspoon onion powder optional, for zestier flavor
- ½ lb tavern smoked ham sliced thick from deli (then sliced into 1 inch long strips)
Optional
- 1 beaten egg for brushing (optional)
Instructions
Prepare the Dough
- In a stand mixer using dough hook or paddle, or by hand with bowl and long spoon, or in food processor mix together all purpose flour, whole wheat flour, salt, sugar, and instant yeast. Add shortening and mix until lightly crumbly.
- Add water and vinegar and knead to form a ball. Cover, and let rest in a warm area for 60 minutes, or up to an hour while you make the cheese sauce.
Start the Cheese Sauce
- While the dough is rising, make the ham and cheese filling in a small sauce pan. Add butter on medium high heat and whisk in flour until smooth.
- Reduce heat to medium low, add shredded cheese, milk or water, cream cheese, paprika (onion and garlic powders optional) and water and stir until combined.
- Allow to melt for 5 more minutes, stirring occasionally until completely smooth; remove from heat.
- Stir in the sliced ham pieces. Set aside.
Assemble the Pockets
- Preheat oven to 350 degrees F.
- On a lightly floured surface, roll dough out to ⅛ inch thickness. Cut into 2x5 inch rectangles.
- Begin filling each pocket with the ham and cheese filling, being careful not to get it on edges. It will spread out during baking.
- Dip index finger in water and run it around the edges; this will create a glue to help seal the pockets.
- Lay the larger, corresponding rectangles evenly over the tops of the cheese and ham filling.
- Use the tines of a fork to seal the edges by pressing all the way around. They don't have to fit perfectly together on the edges, because they'll get trimmed up.
- For a golden, shiny crust, brush with a beaten egg. Pierce multiple times with a fork or slash each pocket 3 times to allow steam to escape.
- Using a spatula, transfer to a parchment paper lined baking sheet
- Bake at 350 degrees F for 20 to 30 minutes, or until golden brown. Check periodically that the steam holes are properly allowing steam to escape so that pockets don't burst and leak all of the cheese sauce out.
- Let cool before eating, and be careful because the filling will be very hot. Breaking in half helps the inside too cool faster.
Notes
- Recipe makes 12 regular sized pockets. Rectangles can be cut larger for larger pockets, or smaller for more pockets of a smaller size.
- Dough can be made using all white flour, or different combination of wheat/white flours as long as it adds up to the 2 ½ cups total flour.
- When the dough goes through it's rise, or resting period, it needs to do so in a warm, non drafty area.
- If you prefer to make the dough in advance, store it in the fridge right after kneading. It can be stored in the fridge, covered overnight. Remove it from the fridge 30 minutes before forming the crusts.
- Don't use pre-shredded cheese, it won't melt smoothly. I has added ingredients to prevent it from caking.
- Don't heat the cheese sauce on too high of heat, because the high heat will cause cheese to separate and become a clumpy, greasy mess. It won't melt back together after that. Instead, have patience and melt low and slow until smooth. That's the key to smooth cheese sauce!
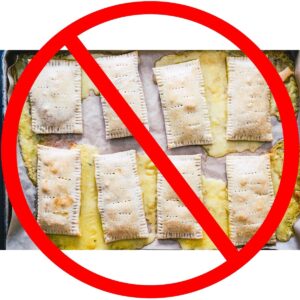
- The steam needs to be able to escape. Poke holes (many, see photo) or slit with a sharp knife a few times. Check periodically that the pockets are not starting to burst at a seam; if they are it just means the holes are not open because they either didn't go all the way through, or they plugged back up, so just re-poke the holes to allow steam out. The photo below shows an example of holes that were not properly poked, or got plugged up:

- Keep extra, leftover Ham and Cheese Hot Pockets in the refrigerator for up to 2 days.
- Pockets can be individually wrapped in freezer, wax, or parchment paper and kept sealed in a freezer zipper bag or plastic container for up to 6 months. Cook first before freezing. To heat, bake in oven at 300 F degrees for 20 minutes, or until heated through. Or, microwave on 50% power for 3 minutes.
- Don't try to freeze them completely raw.
Bry
Sunday 3rd of December 2023
I am so sorry to give this a bad review. I could blame myself for using pre-made pie crust because that's not what this recipe calls for. That filling is a decent cheese sauce but way to big of ham slices. Standard ham n cheese hot pockets have cubes of ham. So the ones here are so big it just doesn't compliment the bite at all. The cheese sauce was decent flavor but then I used that pie crust and I mean it was very huge of a let down. I did use pre-made crust but the ingredients weren't far from this recipe. If you want a ham n cheese hot pocket this just ain't it. You're own tastes may change the results. But I wasted over an hr and I'm not super pleased. Thankfully this is the internet and I'll get over it I guess
Ginny
Thursday 18th of February 2021
I no longer have children in my home but I all of a sudden need prepared foods that can be grabbed out of the freezer and eaten without a lot of kitchen duty. These will work out perfect. We can fill them with dinner leftovers, barbecue, broccoli and cheddar or any number of yummies. Much better than the high calorie processed versions!
Erin
Sunday 21st of February 2021
Hi Ginny! I love the idea of filling them with leftovers, the broccoli cheddar sounds amazing. This time of year stews would be great, I think you'll like the wheat crust too, it's a lot better for you and super tasty.
Jules
Saturday 26th of December 2020
Really great dough recipe. I added two tablespoons of butter to the dough and washed them with egg
Bry
Sunday 3rd of December 2023
@Bry, this taste nothing compared to a ham n cheese hot Pocket. This is a surbaban moms definition of a hot pocket. I'm just so disappointed. It could have succeeded way more with a lil more effort
Bry
Sunday 3rd of December 2023
I'm really just disappointed because I'm poor and I am a decent cook and I couldn't get this recipe to turn out but I spent a lot on it. Not the right flavor. I'm sorry guys
Bry
Sunday 3rd of December 2023
@TaLisha Wheatley Landon, I don't see at all where the addition of the spices will make for a zestier flavor. They are all optional. That is ridiculous to me with the basic spices but I still just now tried this person's recipe and had a bad result so maybe idk anything? Me following this exactly didn't turn out well at all :(
TaLisha Wheatley Landon
Monday 27th of December 2021
Making this recipe and finding a lot of missing information in the recipe. It says in ingredients for Onion Powder and Garlic Powder but never says when to add those ingredients. When making the sauce it says to melt butter but never says how much butter in the ingredients.
Erin
Tuesday 5th of January 2021
Thanks Jules, glad you thought so!
Samantha Fanning
Saturday 20th of June 2020
My kids favorite food is ham and cheese hot pockets so to find this recipe is going to be a game changer for our family! I don't think mine will turn out as perfectly as yours but I'm definitely going to try thank you for posting💕😍
Erin
Monday 22nd of June 2020
Samantha! You know what, that's the fun part, you can make them any shape you want and it kind of can be a laugh sometimes lol. (Of course I only posted the better looking versions of mine haha) I hope you guys like them, and have a fun little project maybe on a rainy day! Thanks for commenting :) xoxo