Making homemade hoagie rolls is a lot easier than you might think! With a few simple ingredients, some patience, a little guidance and help from your bread machine, you'll be making delicious hoagie rolls that will impress your friends and family. This post will give you all the tips and tricks you need to make amazing homemade hoagies using our simple Hoagie Roll recipe.
Whether you're looking for something easy or something gourmet, this recipe has it all. So get ready to create the perfect sub roll – let's get started!

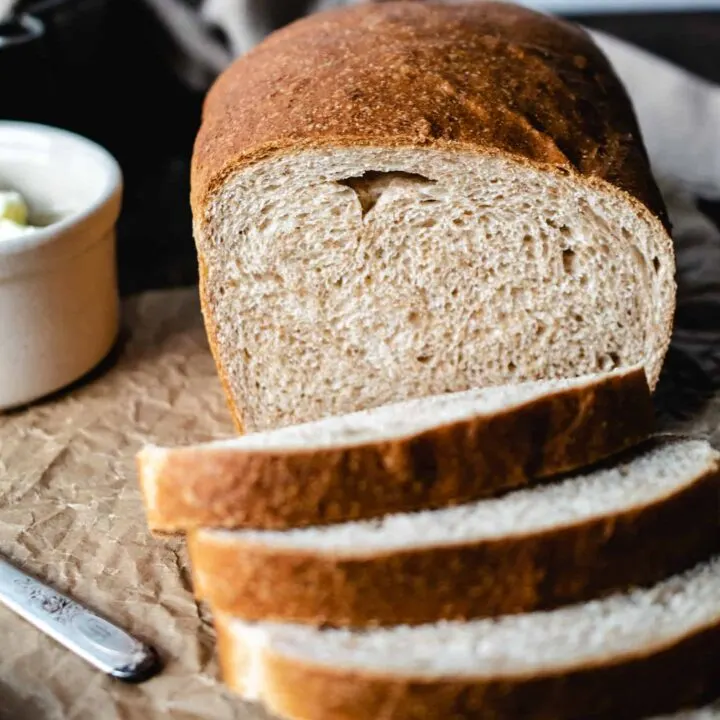
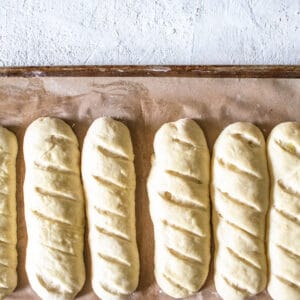
These homemade bread machine hoagie rolls are so incredibly soft and elevate any sandwich you make with them.
These are so easy because the bread machine does the hard work, and you get to do the fun part, which is rolling them up! It's only about 10 minutes of hands-on time, while the rest is spent in the machine, rising or baking.
What is a Hoagie Roll?
A hoagie roll is a type of long, soft sandwich roll that originated in Philadelphia. It's made with a white flour dough and can usually be topped with sesame seeds or poppy seeds, but doesn't have to be.
Hoagies can be filled with meats, cheese, lettuce, tomato, mayonnaise and other condiments to make the perfect sandwich.
The great thing about hoagies is that they can be made to suit every taste - you can fill them with anything you like!
If you're also looking for a simple and delicious classic bread recipe, check out this bread machine white bread.
Why Make These Homemade Sandwich Rolls
- Handmade hoagie rolls taste infinitely better than store bought.
- You get to control the ingredients, making them healthier and free of preservatives or other additives.
- Making a batch of homemade hoagie rolls is much cheaper than buying pre-made ones from the grocery store.
- Homemade hoagie rolls are fun and easy to make – perfect for a family activity!
- Making your own sandwich rolls makes them even more special when you serve them.
Ingredients Needed
Get more info on these pantry staple ingredients in the recipe card at the bottom of the post.
- bread flour- using bread flour is essential for this recipe, see the FAQ section to see why we suggest using it over regular, all purpose or self rising flour for this recipe.
- large eggs
- water- I use warm water when possible
- milk
- salt
- sugar
- instant yeast
- butter
How to Make Hoagie Rolls
- Add all ingredients to the bread machine and set it to dough only cycle.
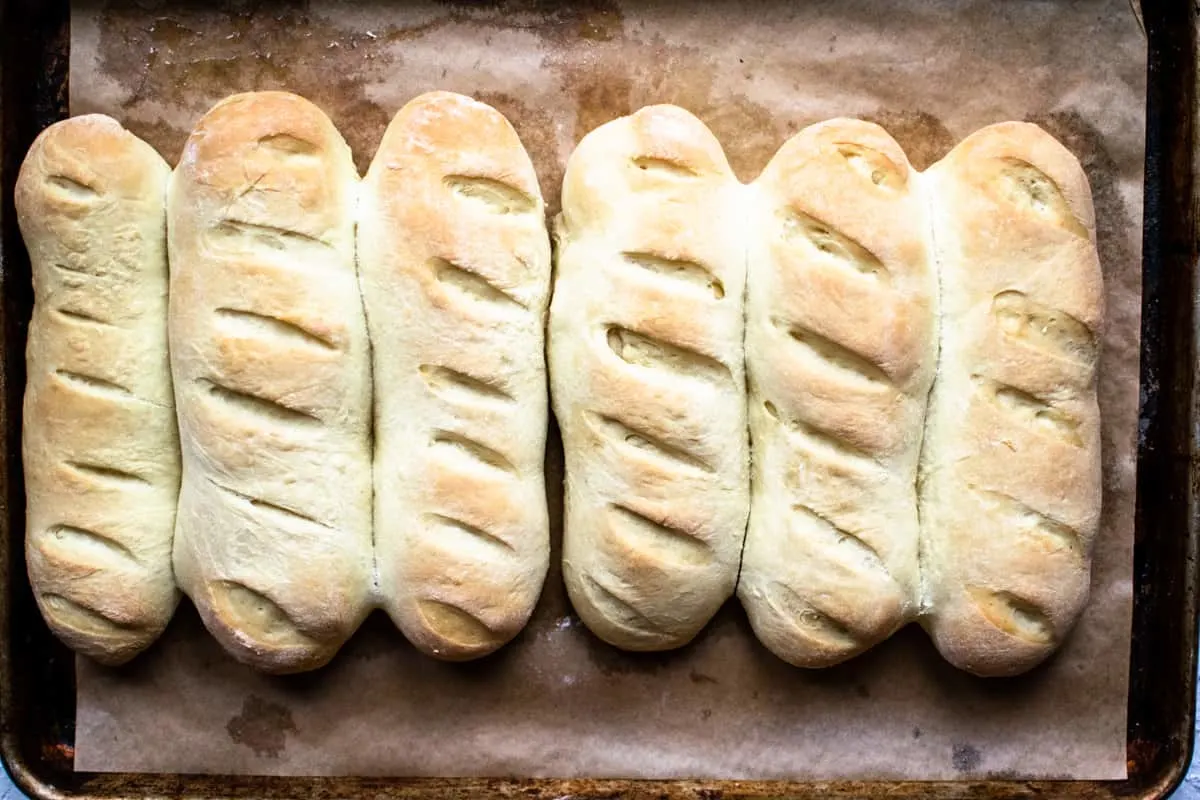
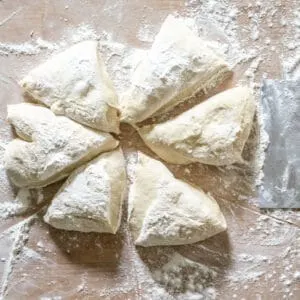
- When the cycle is complete, turn dough out onto a lightly floured surface. Using a dough scraper or knife, divide the dough into six equal parts.
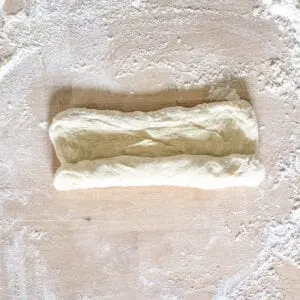
- Stretch each piece of dough section out into 1-inch thick rectangles, and then roll them up.
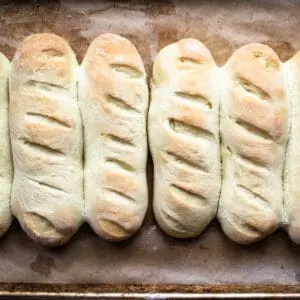
- Roll each section into a long tube about 4 inches long, and pinch the seam together- that will be the underside so flip it over once it's pinched and place the seam side down. I like to place the hoagie rolls on a baking mat when shaping them.
- Slice each top long ways with a sharp knife or razor blade, down the middle, or make several slashes going across. This helps the rise further.
- Let rise another 30-60 minutes, until doubled in size.
- When the dough is almost down doubling in size, go ahead and preheat the oven to 375 degrees.
- Place little loaves on a lined baking sheet. Bake for 20-25 minutes or until golden brown. Once cooled, slice for sandwich making.
Storage
For best results, homemade sub rolls can be stored in an airtight container or a zip-top plastic bag to keep them from drying out. When the rolls are completely cooled after baking, wrap each roll individually in plastic wrap and place them in a container or bag.
To keep for up to one week, store the wraps container or bag in the refrigerator. If you wish to freeze the rolls, wrap each individually with plastic wrap and place them into a freezer-safe zip-top bag.
The frozen sub rolls will last up to three months and should be thawed overnight before serving.
Tips and Variations
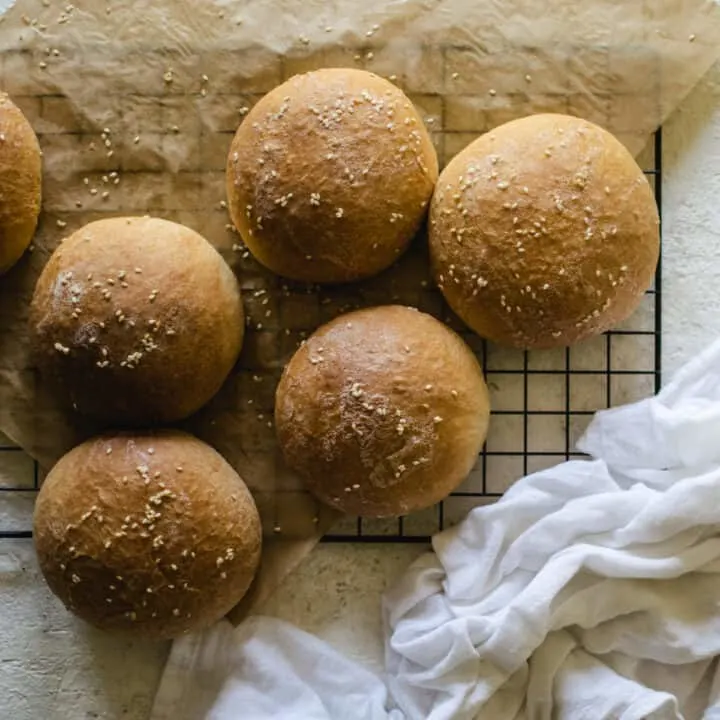
- You can add some sesame seeds or even poppy seeds to the tops of the buns if desired to make a seeded hoagie recipe.
- If this is the first time making your own bread, know that the second rise may take anywhere from 30-60 minutes.
- Keep your bread in a warm place that doesn't get a draft so it has a constant temperature when you are letting it rise the second time.
- You do not need to cover your rolls with a kitchen towel or plastic wrap when they are rising a second time, just make sure they're in a draft free, warm space.
- Line your baking sheet with parchment paper or a baking mat to help the rolls not stick to the baking sheet.
- If you want a nice shiny, golden bread crust, you can make a beaten egg wash and use a pastry brush to brush it on your bread rolls before you want to bake them.
What is bread flour?
Bread flour is a type of high-gluten, high-protein flour that is made from hard wheat. It has a higher protein content than all purpose flour, which gives it the strength and elasticity necessary to make yeast breads rise properly.
This makes it the ideal choice for recipes like hoagie rolls, as it allows for plenty of structure and rise without becoming too dense or gummy.
Bread flour will give your rolls an airy texture and beautiful golden crust. It's also important to note that bread flour absorbs more liquid than all purpose flour, so you may notice that recipes, like this one using bread flour tend to use a little more water to make your bread dough than other bread recipes.
Can I use all purpose flour?
Yes, you can use all purpose flour to make hoagie rolls; however, it won't give you the same results as bread flour. All-purpose flour is made from soft wheat and has a lower protein content than bread flour.
This means that your rolls won't rise as much, and they may become dense or gummy. Additionally, all-purpose flour absorbs less liquid than bread flour so if you're using all-purpose in place of bread flour, reduce the amount of water called for in the recipe.
I know bread flour can be hard to find, so this is an option to use to make these bread rolls, it is just not our preferred way to make the rolls with optimum texture.
What is instant yeast?
Instant yeast is a type of yeast that does not need to be proofed or activated before using. Unlike active dry yeast, which needs to be dissolved in water before use, instant yeast can be mixed directly into your dry ingredients.
The advantage of using instant yeast is that it can save time and energy when making bread. It doesn't require extra steps like dissolving or proofing, so you only need one rise for the dough.
This makes it simple and convenient to use in recipes like hoagie rolls.
How do I know if yeast is still good or not?
The best way to tell if your yeast is still good is to do a proof test. This involves mixing together some of the yeast, warm water (about 110°F), and a pinch of sugar.
Let the yeast mixture stand for about 5 minutes, until you see bubbles form on top. This indicates that the yeast is still active and therefore good to use in your recipe.
If you don't see any bubbles, then your yeast has gone bad and it's best to discard it and start with new yeast for your baking project.
Can I make the hoagie roll dough using a stand mixer?
Yes, you can make hoagie roll dough using a stand mixer. To use a stand mixer for bread dough, add all the dry ingredients to the bowl of a stand mixer, then add the yeast and mix on low speed until everything is combined, using a dough hook if you have one.
Next, add the water and butter to the dry ingredients in a slow stream and mix with the dough hook on low speed for about 3 minutes until everything is just combined.
Increase the speed to medium-high and knead for 8 to 10 minutes, scraping down the sides of the bowl as needed.
Finally, shape your dough into a ball and let it rest in an oiled bowl until doubled in size before shaping as suggested in our original instructions for using the bread machine.
Then once you've shaped and let rise again you can bake the bread on a baking sheet according to our regular instructions.
Can I use this recipe to make other kinds of bread?
Certainly! This bread dough recipe is great for using to make other kinds of bread. You can easily shape the dough section into long, smaller sections to use as a hot dog bun.
You can make them into round buns to use as hamburger buns and you can make bigger, thicker loaves of bread to cut up and use for other recipes.
Let your imagination take control and see how many different ways you can use the dough to make different kinds of bread for your favorite recipes.
How can I serve these hoagie rolls?
Use these any time you're having French dip Sandwiches, or try them with these Chicken Salad Sandwiches.
These are the obvious choice whenever you are making homemade subs, heroes, or sandwiches. They are great for meatball subs too!
Try these other related recipes.


📖 Recipe

Homemade Bread Machine Hoagie Rolls
Ingredients
- 3 ¼ cups bread flour
- 2 large eggs
- ¾ cups water
- 2 tablespoon milk
- 1 teaspoon salt
- 1 tablespoon sugar
- 2 ½ teaspoon instant yeast
- 3 tablespoon butter
Instructions
- Add all ingredients to bread machine and set to dough only cycle.
- When cycle is complete, turn dough out onto a floured surface. Using a dough scraper or knife, divide dough into six equal parts.

- Stretch the dough out into 1 inch thick rectangles, and roll them up.

- Roll each section into a long tube about 4 inches long, and pinch the seam together- that will be the underside so flip it over once it's pinched.


- Slice each top long ways with a sharp knife, down the middle, or make several slashes going across. This helps the rise further. Let rise another 30-60 minutes, until doubled in size.

- Preheat oven to 375 degrees.
- Bake 20-25 minutes until golden brown. Once cooled, slice for sandwich making.
Notes
- If desired, brush with a beaten egg before baking for a shiny, golden crust.
- Second rise may take anywhere from 30 to 60 minutes.
Vincent
Wednesday 5th of March 2025
After I divide the dough into six equal parts can I put them back into my Zoj machine, 2 at-a-time during the SHAPING CYCLE to bake in there? I'm guessing the machine would be in the 2 pound WHITE MODE. Thanks
Allen Rushton
Tuesday 9th of April 2024
Easy to make. Turned out 10 smaller rolls as 6 was more than a mouthful. Bak8ng and rising times were the same. Made these with all purpose flour the first time and they were good. Bread flour made a huge difference in texture of the rolls.
M
Saturday 3rd of February 2024
Recipe works perfectly as is no need to get out your scale and weigh ingredients. Recipe is foolproof as long as you know how to use a measuring cup. Super easy to make, borderlining on fun.
Lin Cline
Tuesday 30th of January 2024
Super easy to make, HOWEVER, my dough was so sticky I actually ended up folding in almost another cup of flour. I always weigh my flour and liquids. Maybe that was the problem. The recipe calls for 3 1/4 C flour which in grams is 390g (King Arthur has a great weight chart) and the liquid 3/4 C water and that was 6 oz, other than that, all the other measurements were what you called out. It took folding over many times once the dough completed in the bread machine. I knew then there was a problem when it stopped because it was so soft it just spread out all over. Would you be so kind as to weigh out your ingredients to see if that is the disconnect and then comment back? Thank you. They are proofing now so we will see how they come out. I've been baking breads for years, so I just thought making the dough in my bread machine that doesn't get used much would be a super easy method and it was. Thus the 4 stars.
Lin Cline
Tuesday 30th of January 2024
@Lin Cline, These came out nice and soft on the inside and a little crunchy on the outside. Probably because I had to add the extra flour. I might try this in my Kitchen Aid Mixer so I can determine the actual amount of flour and hold back some water and add as I go. Thanks for a tasty roll. Sausage and peppers tonight!! :-)
Shelby
Thursday 4th of January 2024
My daughter and I made these for dinner last night…and OH MY GOODNESS!! These were so easy and the taste was beautiful! We added some shredded cheese and Italian seasoning on top before we baked them! 😋 will be making these quite often! Thank you for the recipe!